Getting started
We understand how daunting it can be to open a completely new program and try to make sense of it. It’s akin to venturing into an exotic country with a different culture, language, and origins.
However, there’s no need to worry. You’re not alone in this endeavor. We’re here to assist you every step of the way, ensuring that your first experience with our platform is smooth and comfortable. Consider us your trusted guide, helping you feel at home in no time. So go ahead, grab a cup of ☕, and let’s get started!
Do not go gentle into that good night…
When you go to the Forloop platform’s start page you will have three options how to continue:
- Getting Started
this option will take you to a step-by-step tutorial and leave you with a basic knowledge about the platform elements and a simple pipeline ready
you can find a step-by-step guide through this tutorial in the chapter Tutorial walkthrough
- No Code
this option takes you straight to the cloud version of Forloop
if you want to start here, the Meet Forloop Cloud section might come in handy
- Desktop
this options will take you to a download page of the desktop version of Forloop
the Meet Forloop Desktop section might come in handy in this case
Tip
If you are completely new to the platform we recommend choosing the first option and see Tutorial walkthrough.
Tutorial walkthrough
In this guide, we will walk you through the process of selecting elements from a webpage(s) of your choice and extracting data from it (them). Moreover, you will learn how to save the extracted data as either a CSV file or directly to Google Sheets. The final step of the tutorial will introduce you to the platform itself, where you’ll find a freshly generated no-code pipeline encompassing the entire process.
In a nutshell, by following this tutorial, you will:
Learn how to easily select webpage elements using the Forloop browser view
Perform your first data extraction with Forloop, marking an exciting milestone 🎉
Preview the extracted data in an elegant tabular structure
Save the data locally or send it to Google Sheets
Not bad for just a few minutes of work, right?
Note
Currently, we have one tutorial available that focuses on web scraping use cases. However, in the near future, we have plans to release additional tutorials catering to various use cases. So, stay tuned for upcoming tutorials!
Step 1 - Enter a website
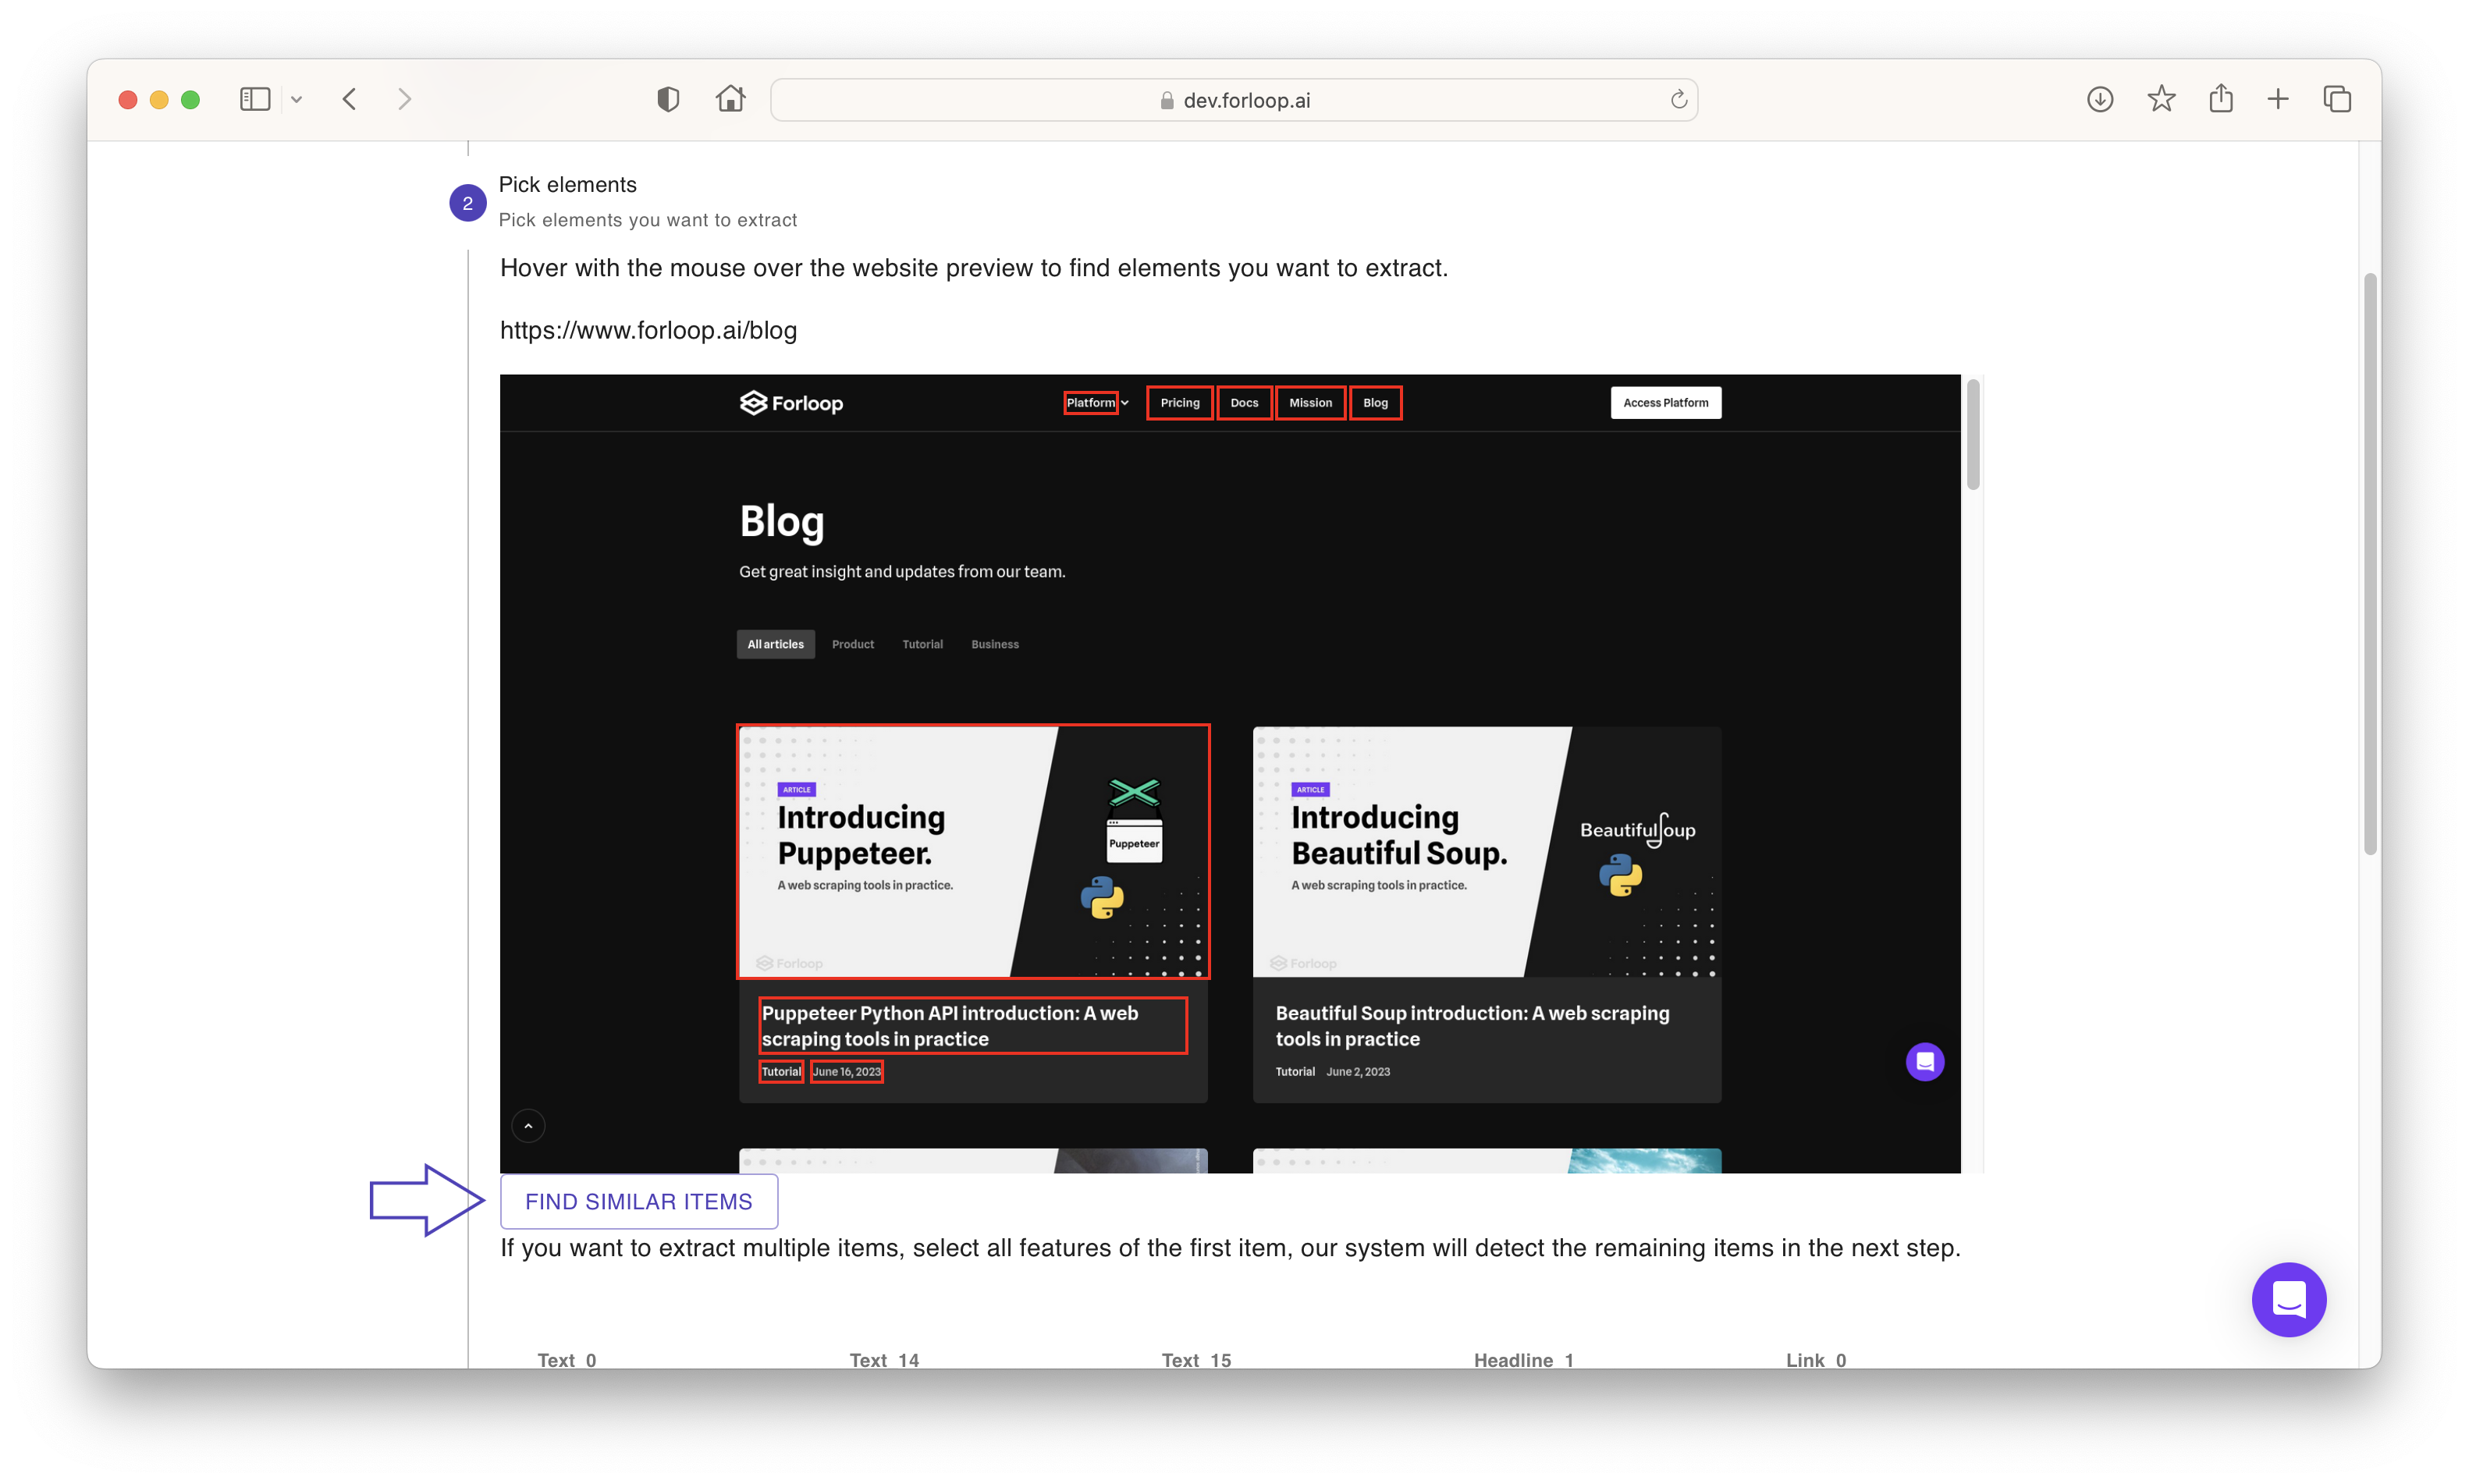
At the first step you need to enter URL of the website you want to scrape. We chose https://www.forloop.ai/blog but you can choose whichever website you like.
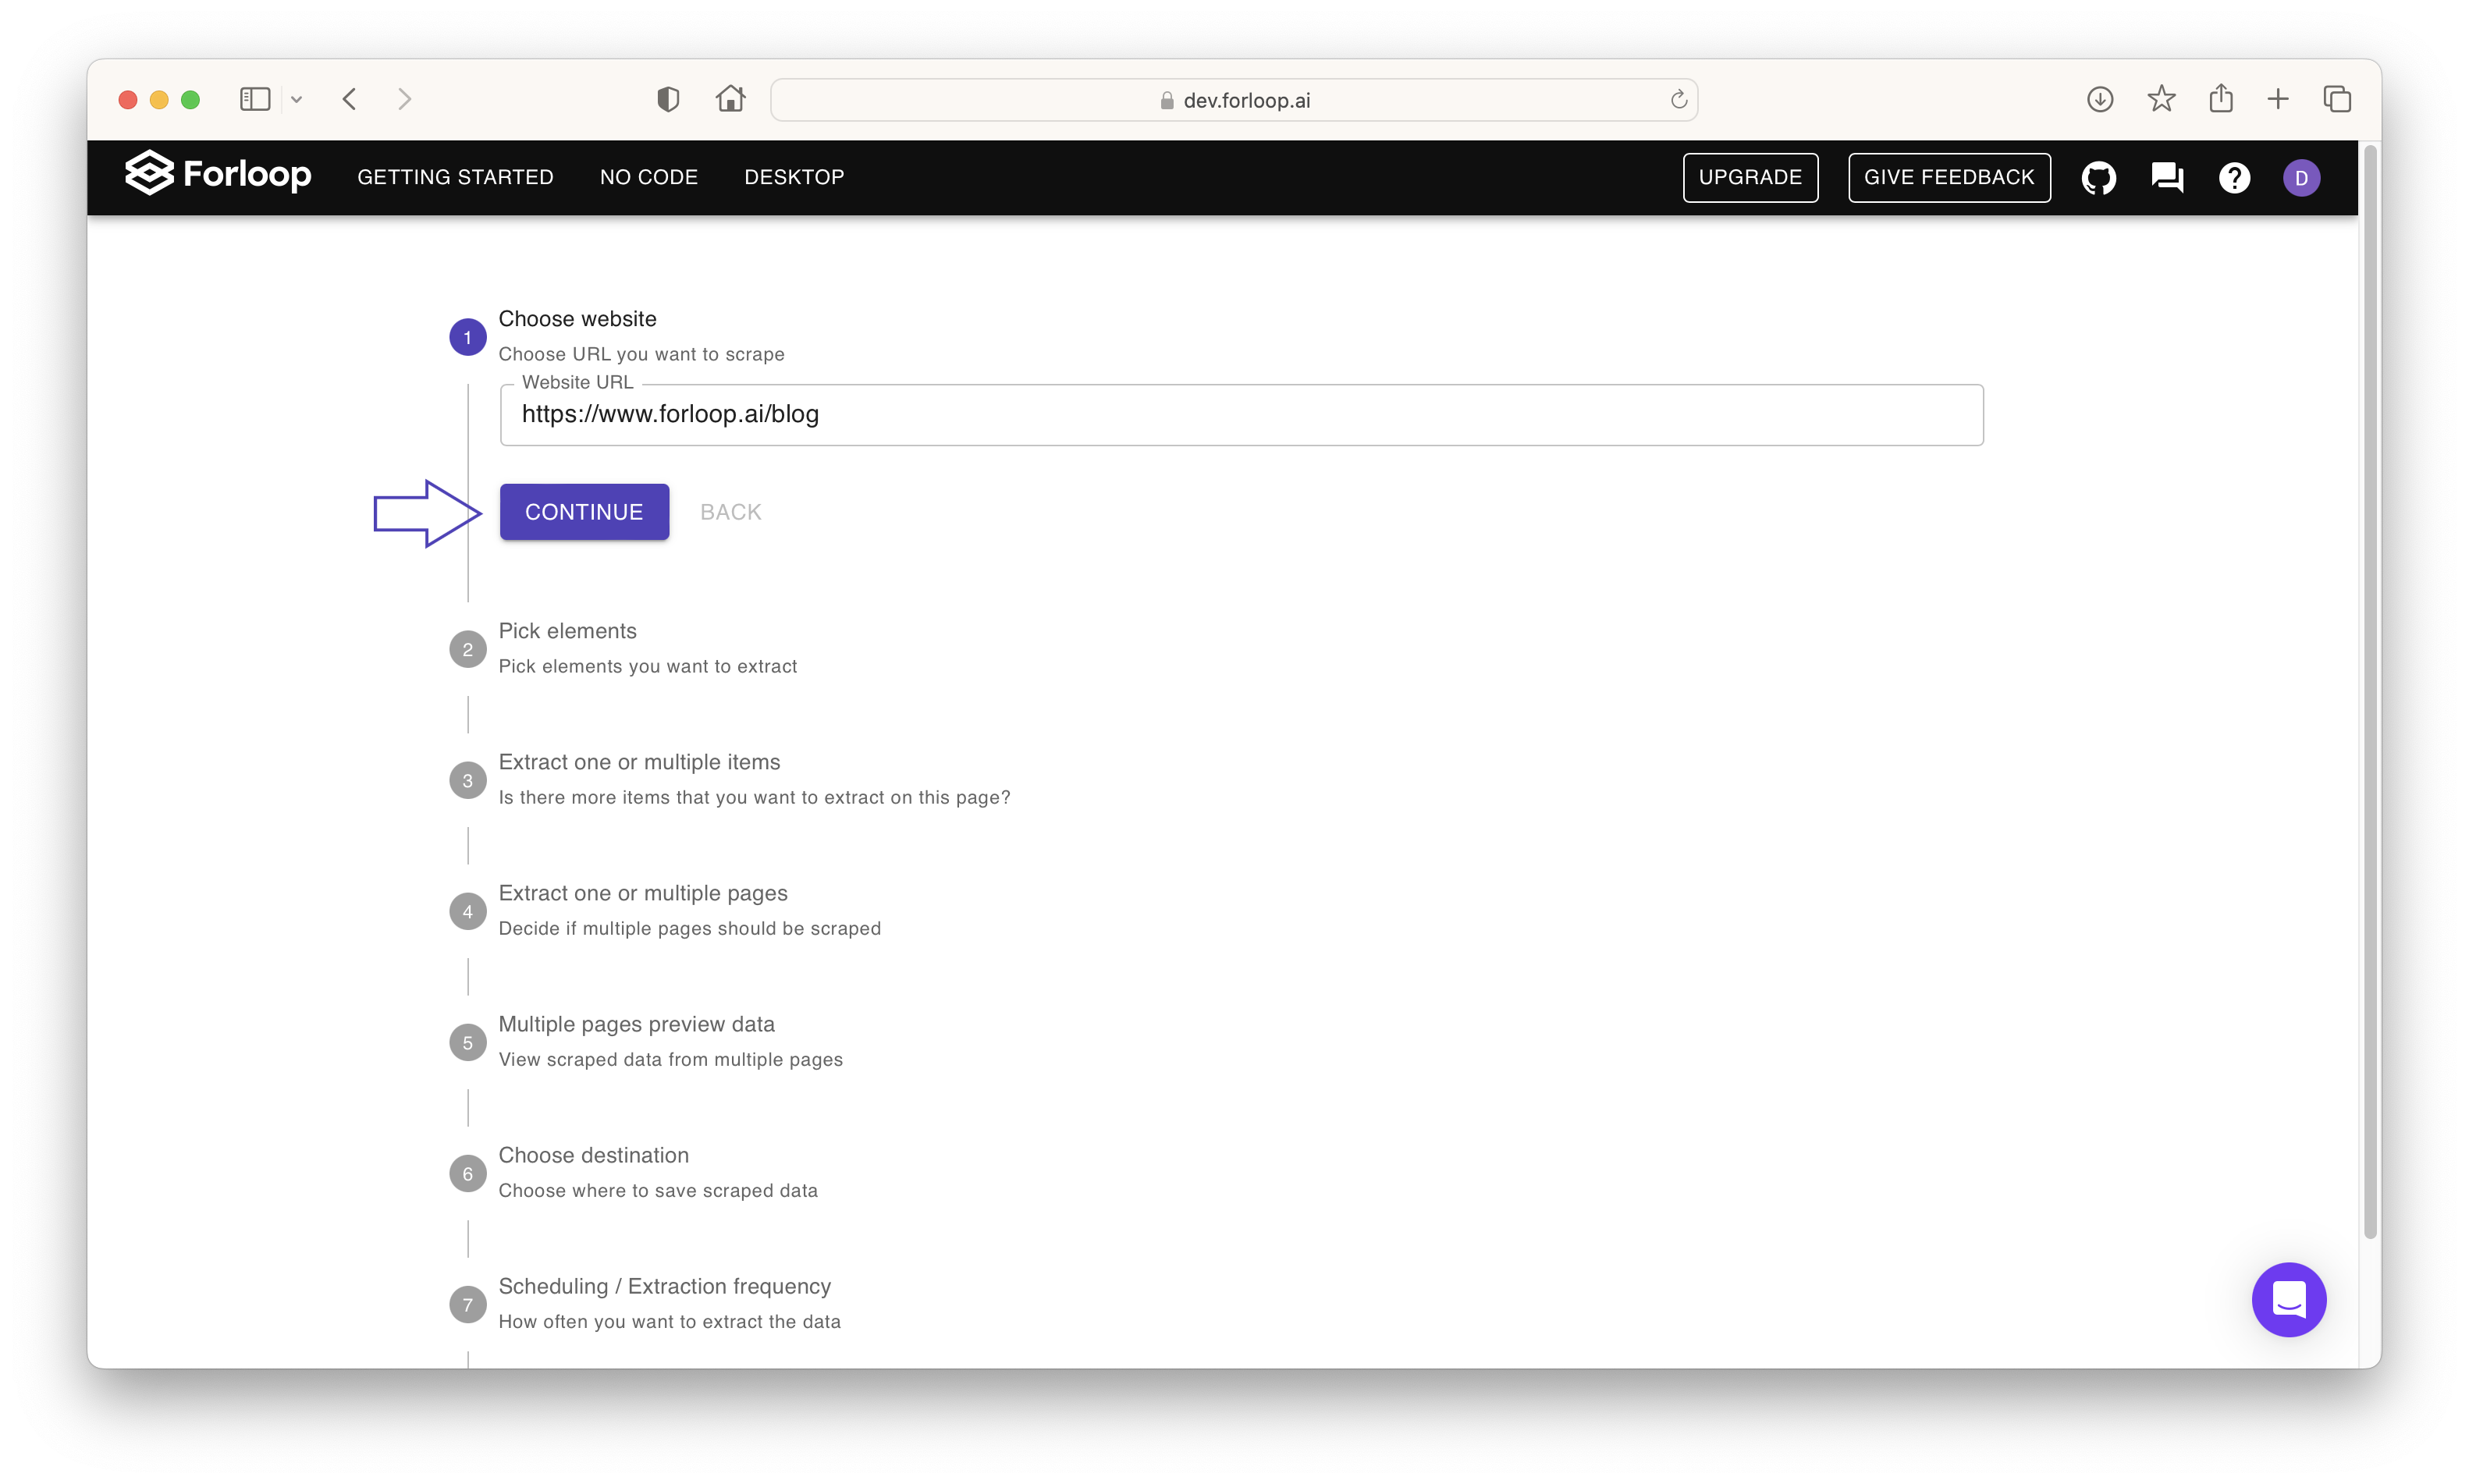
After entering the website in the field, click continue.
Step 2 - Pick elements
After loading the website, you will be prompted to select the elements that Forloop should search for. You have the option to select all possibilities, but you can also choose specific elements if you have a clear idea of what you are looking for.
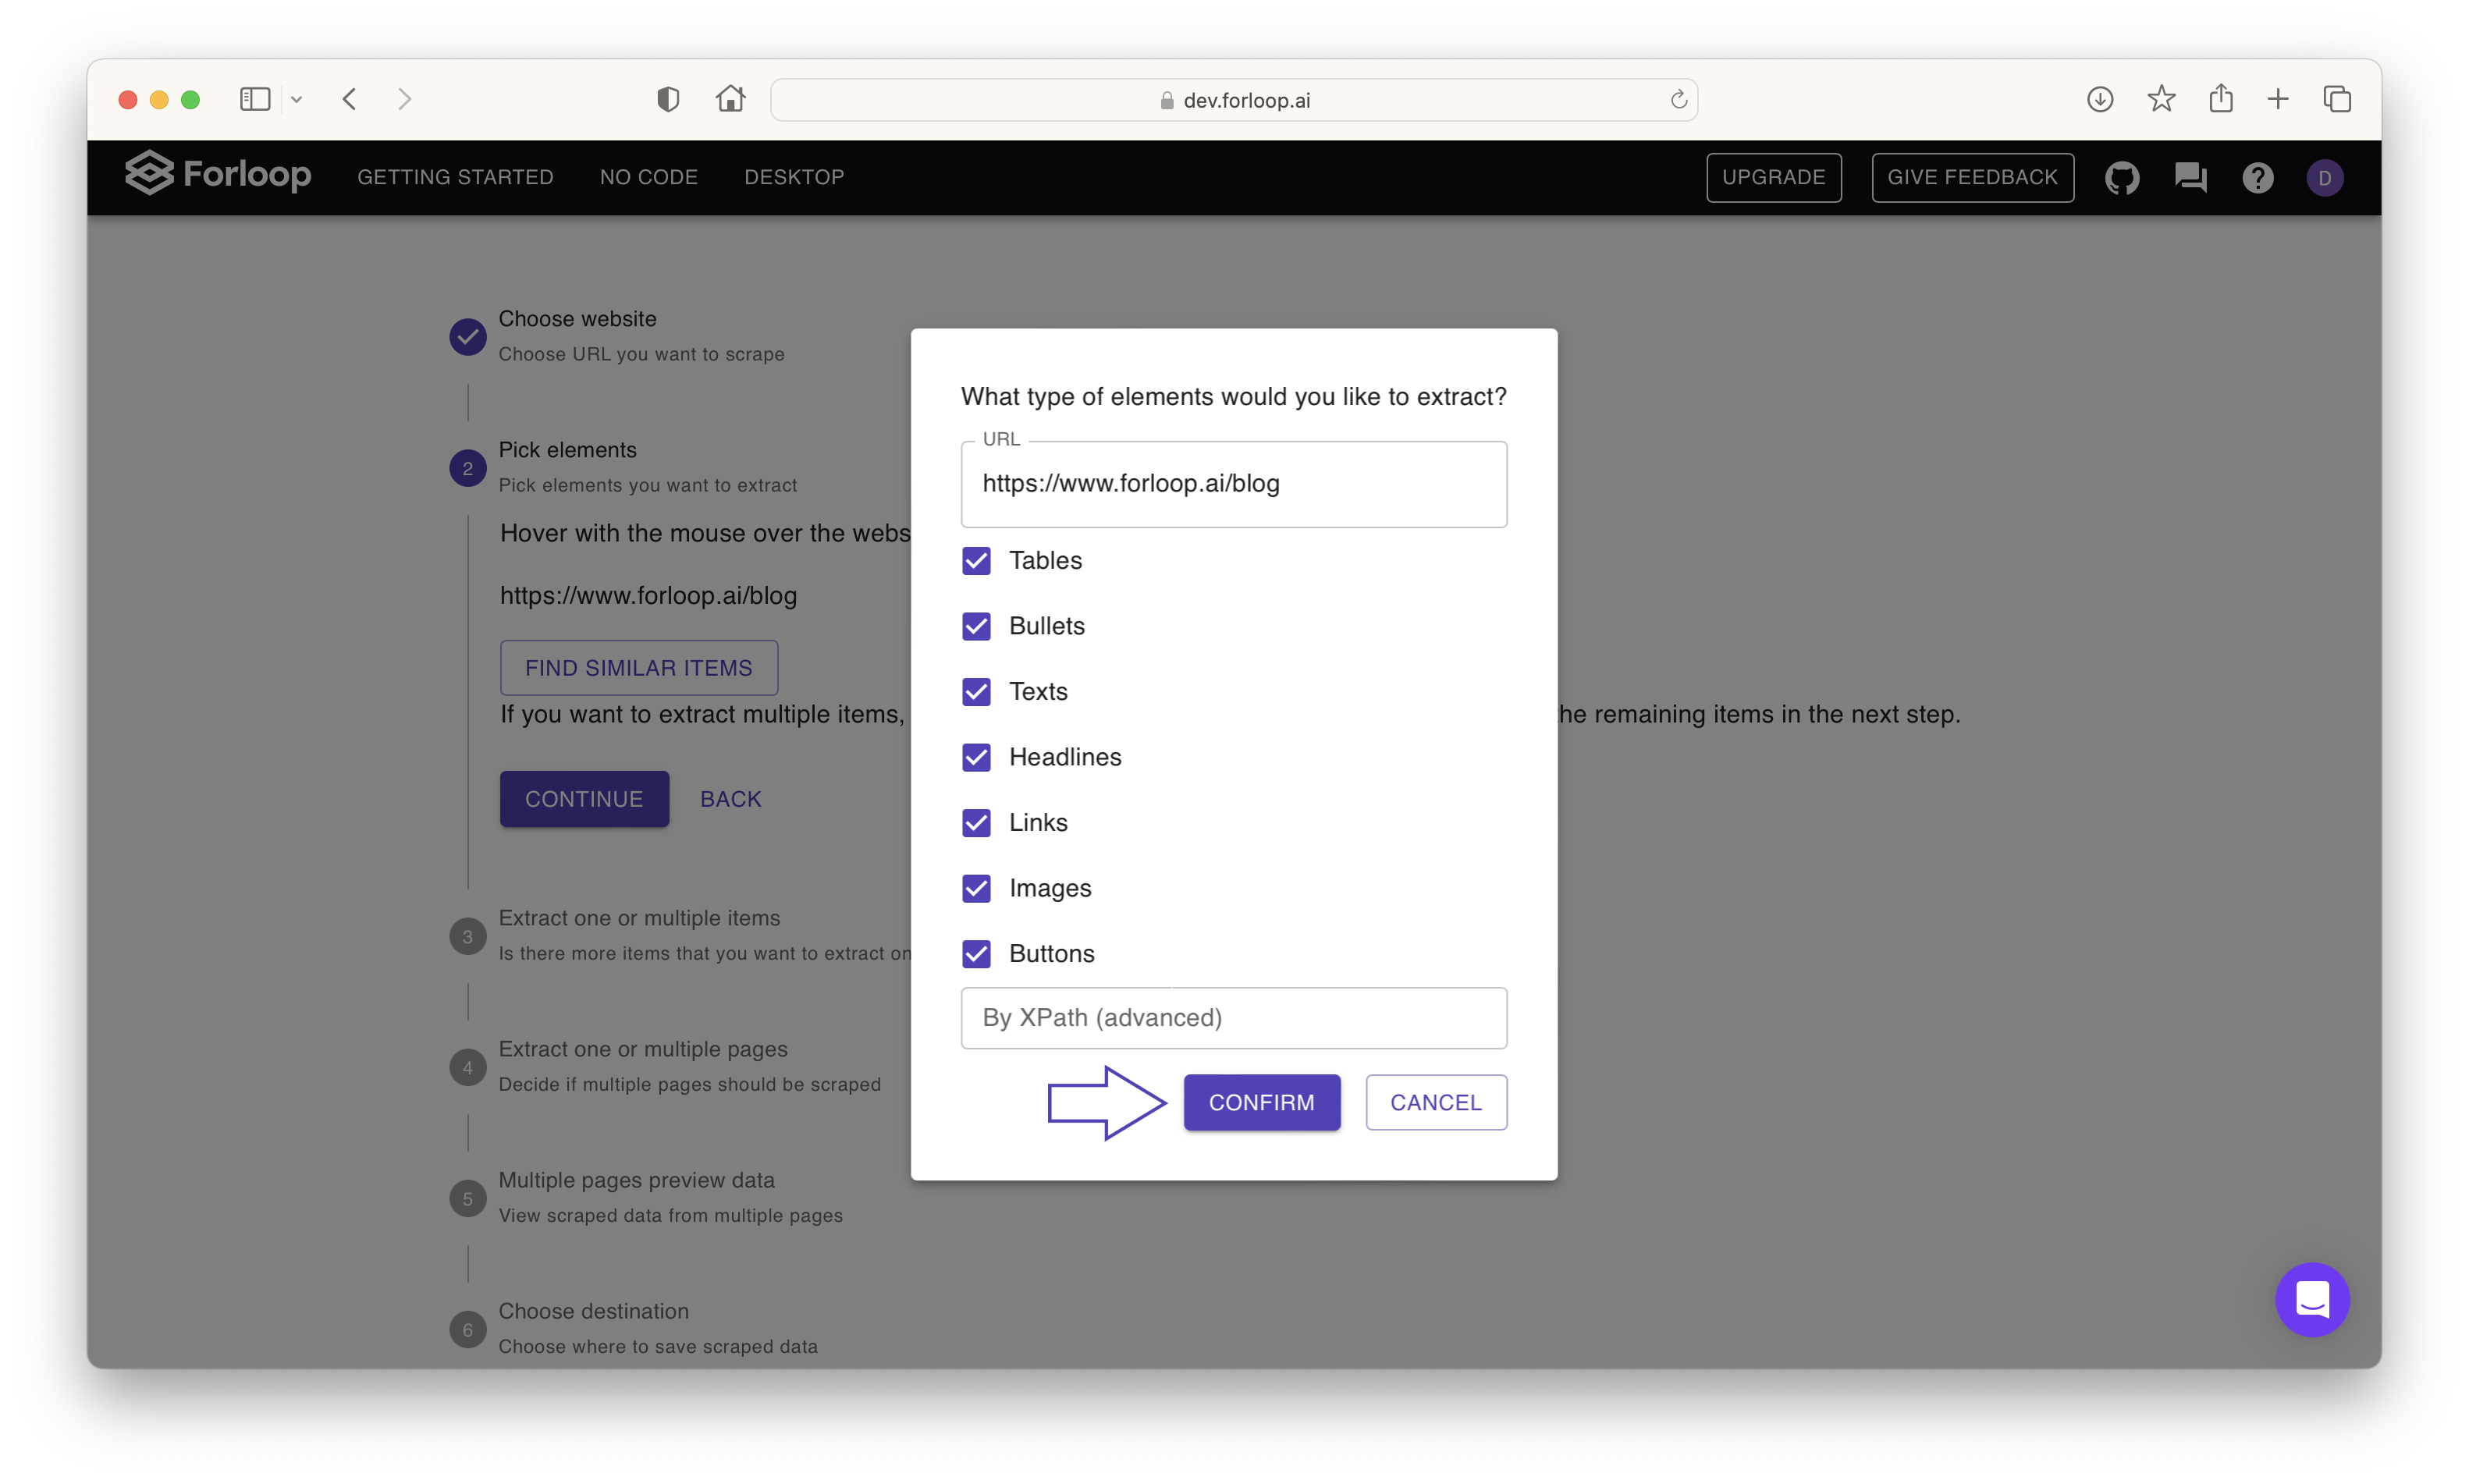
When all of the desired elements are selected, continue with confirm.
Step 3 - Select website’s elements for scraping
After a short while a preview of the webpage will be loaded, in our case of https://www.forloop.ai/blog:
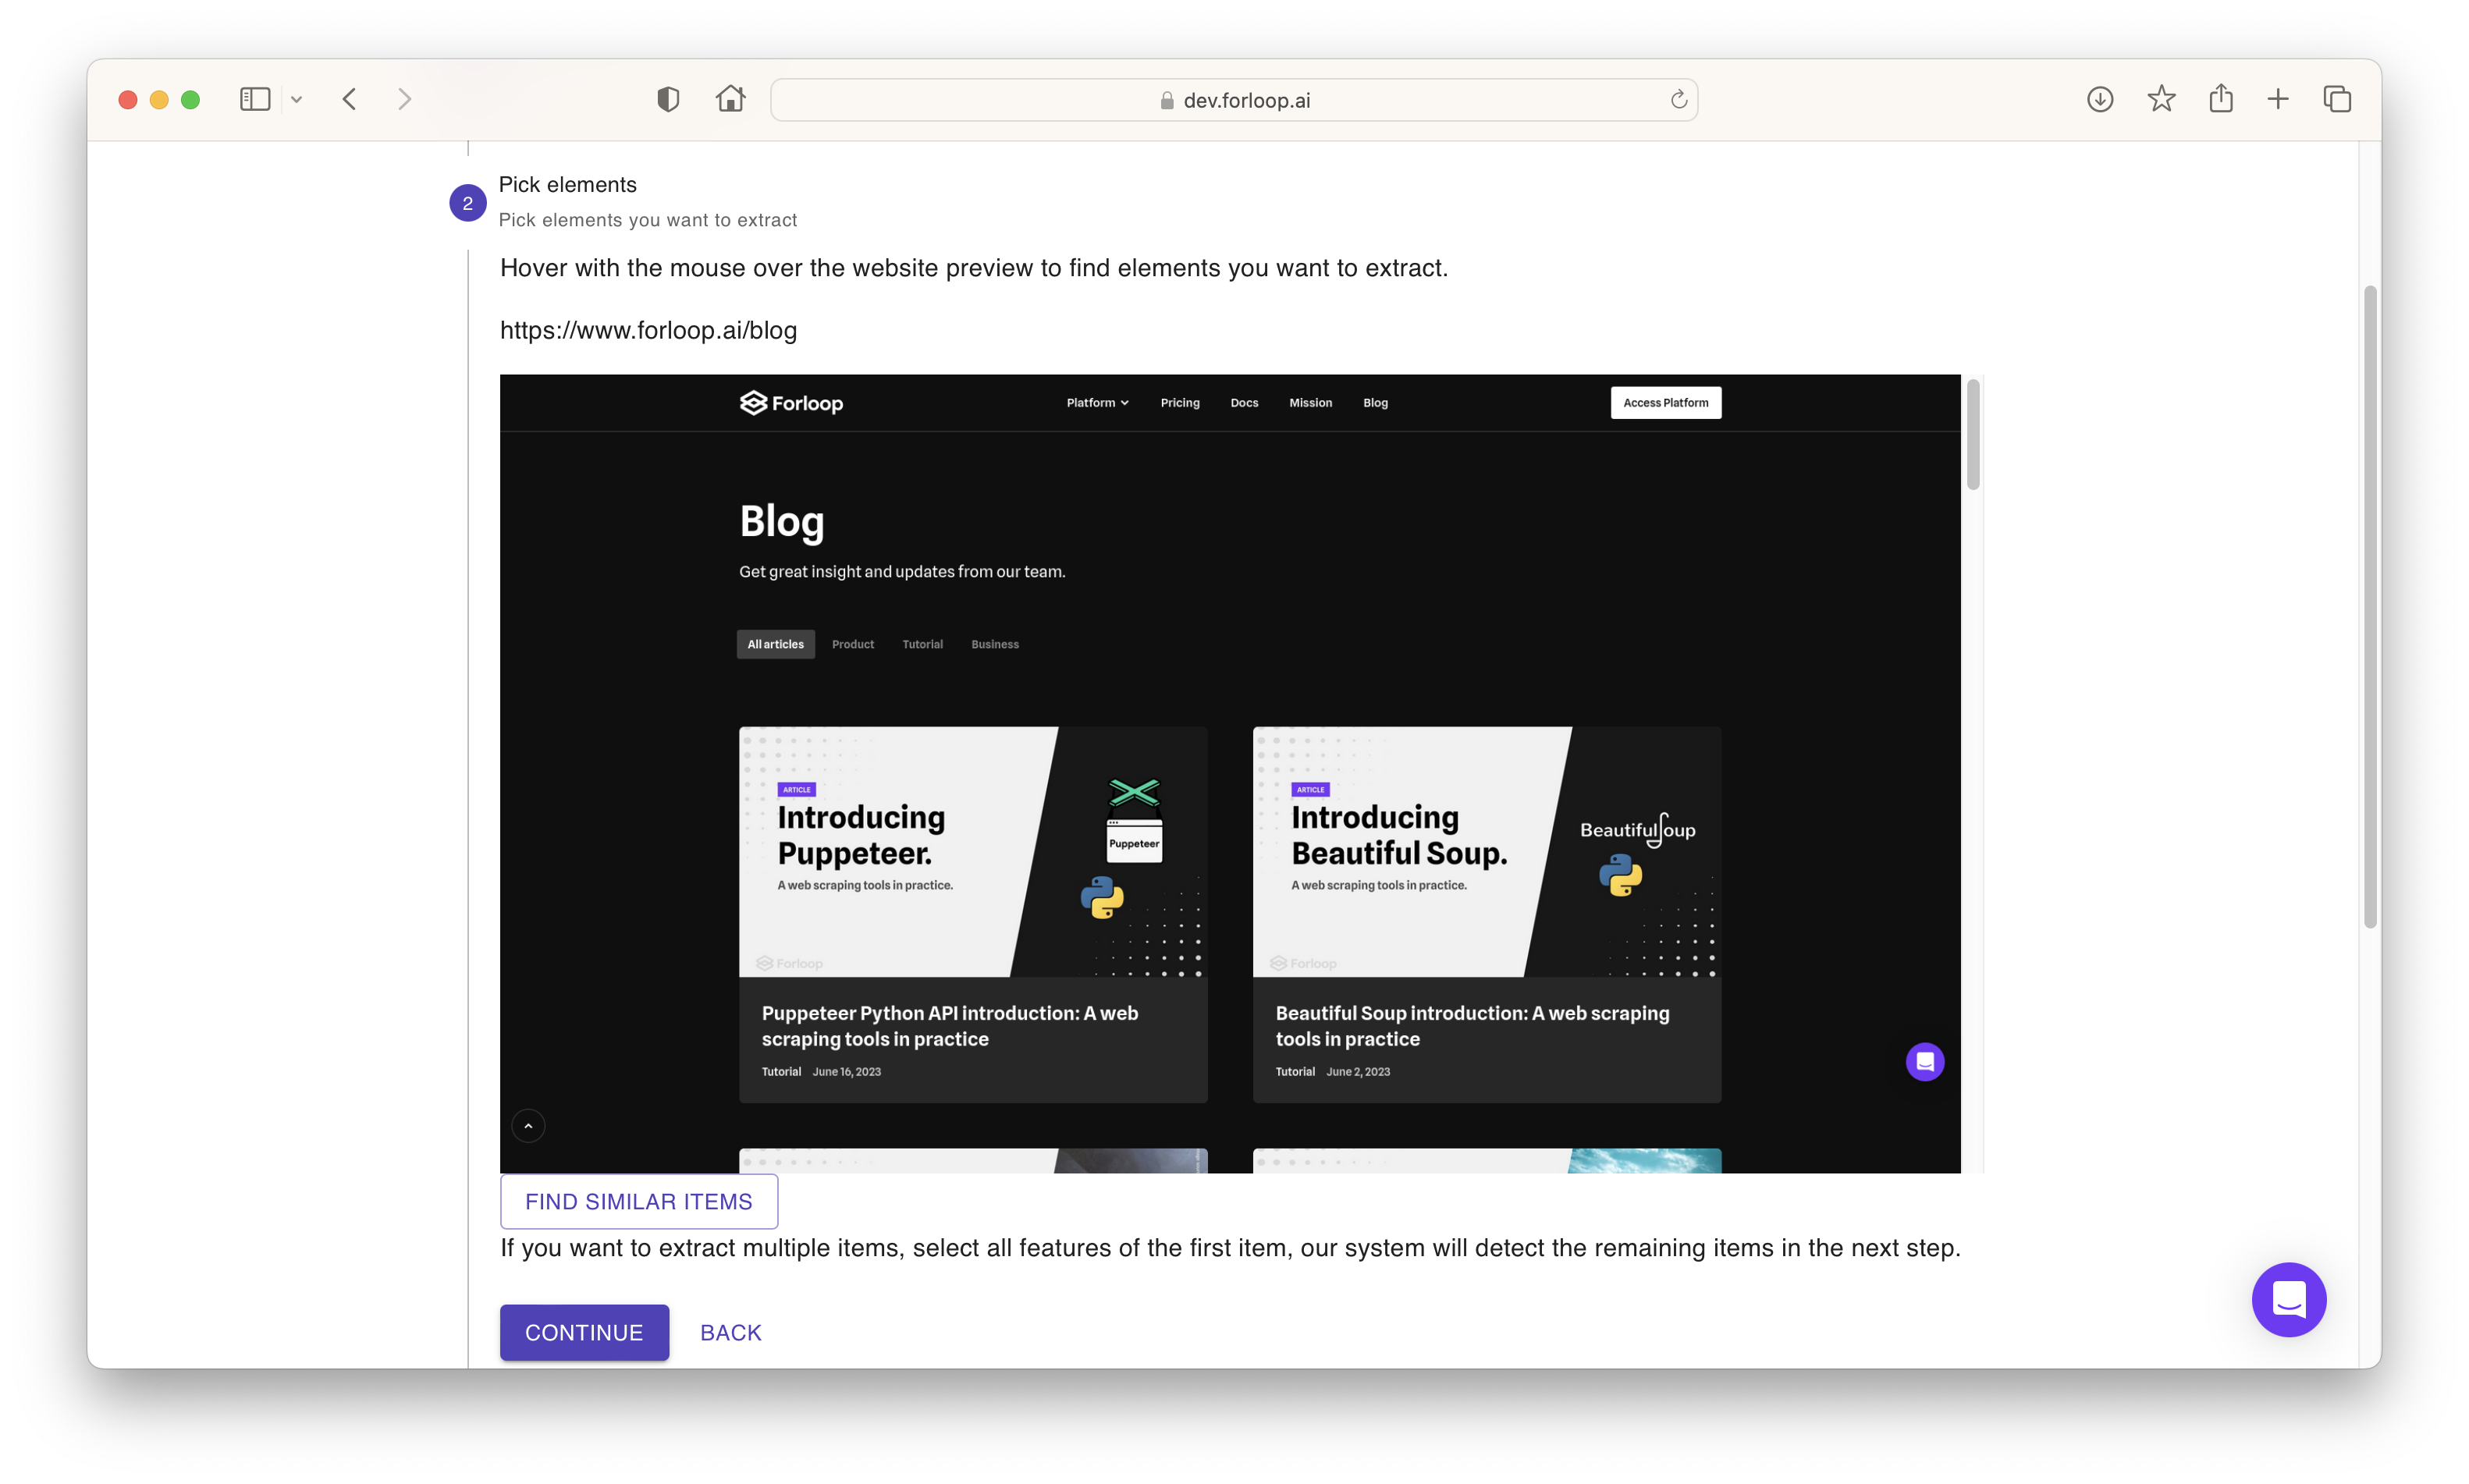
You can actively select the elements which you would like to scrape as shown here:
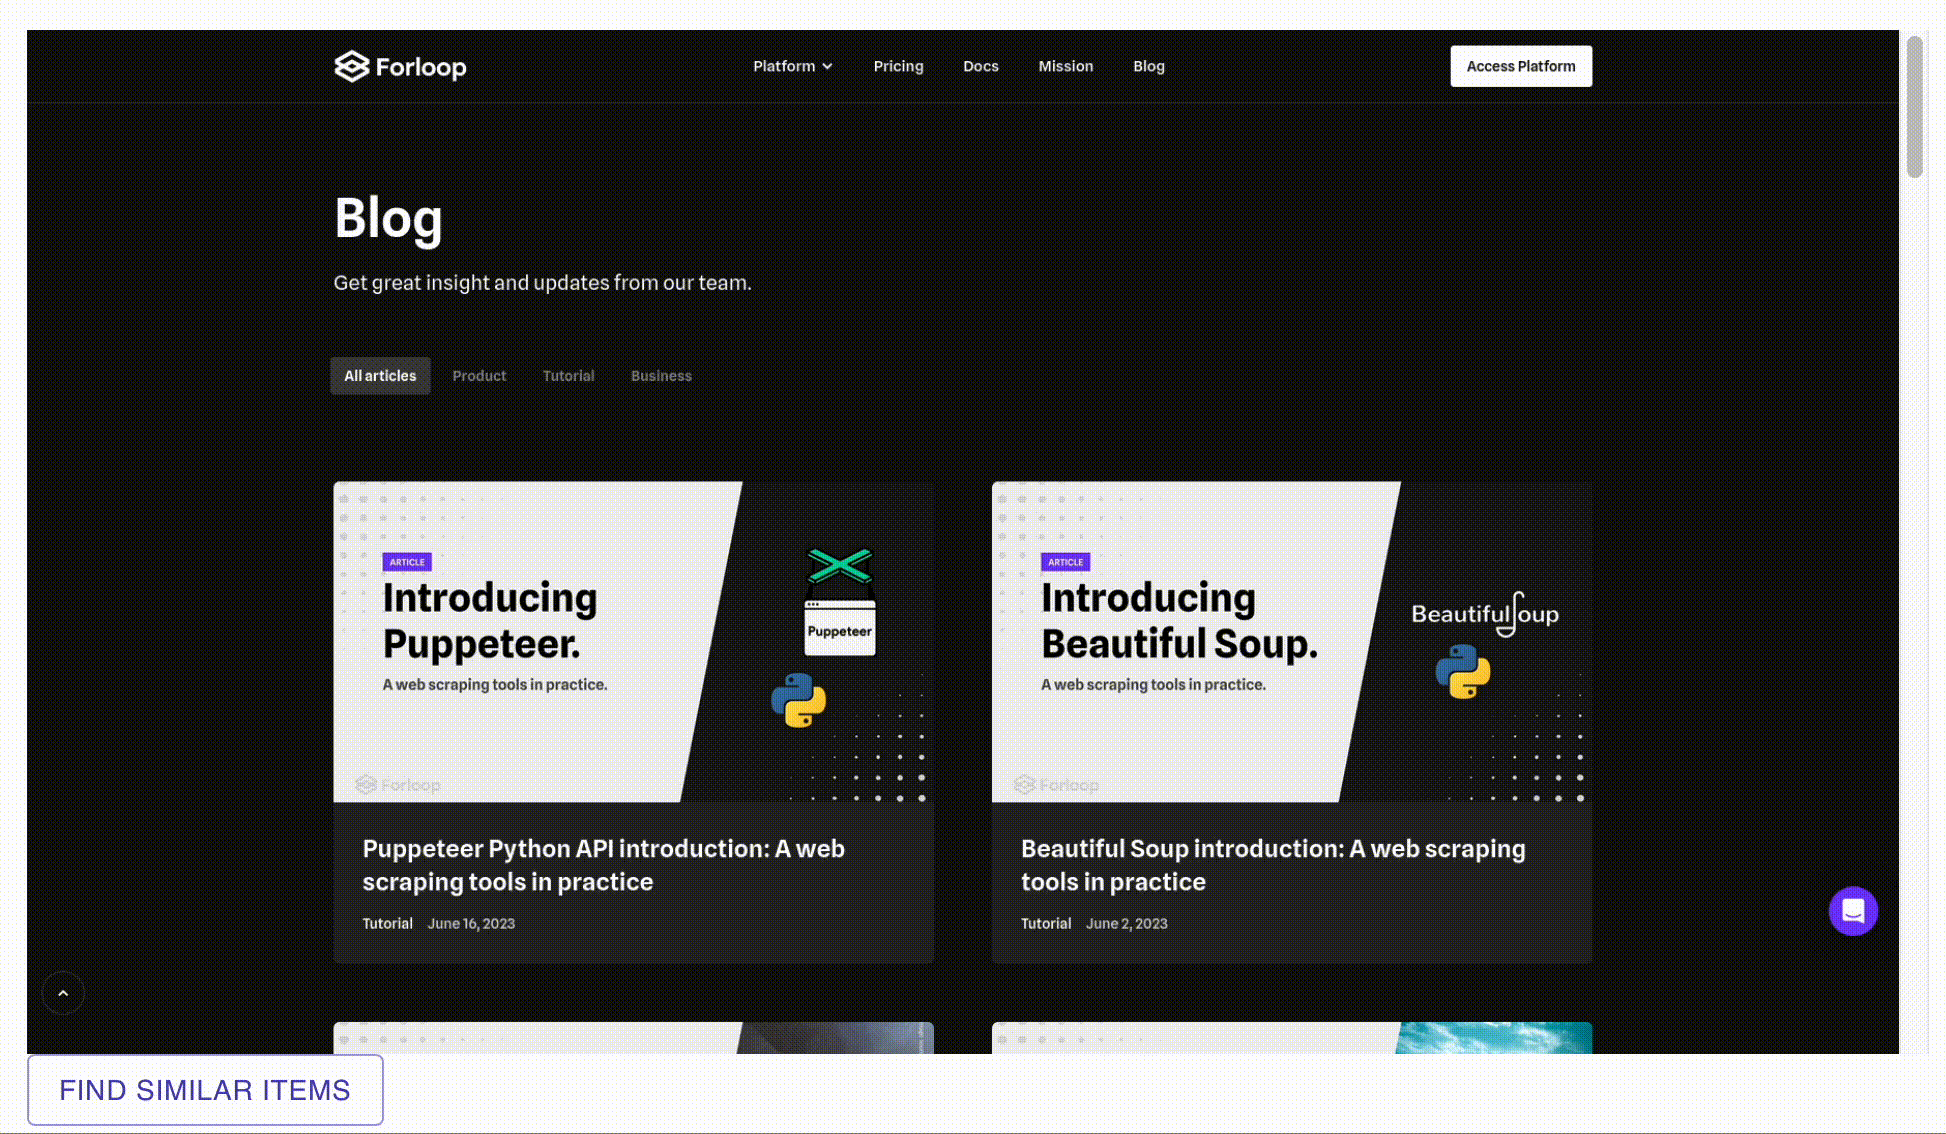
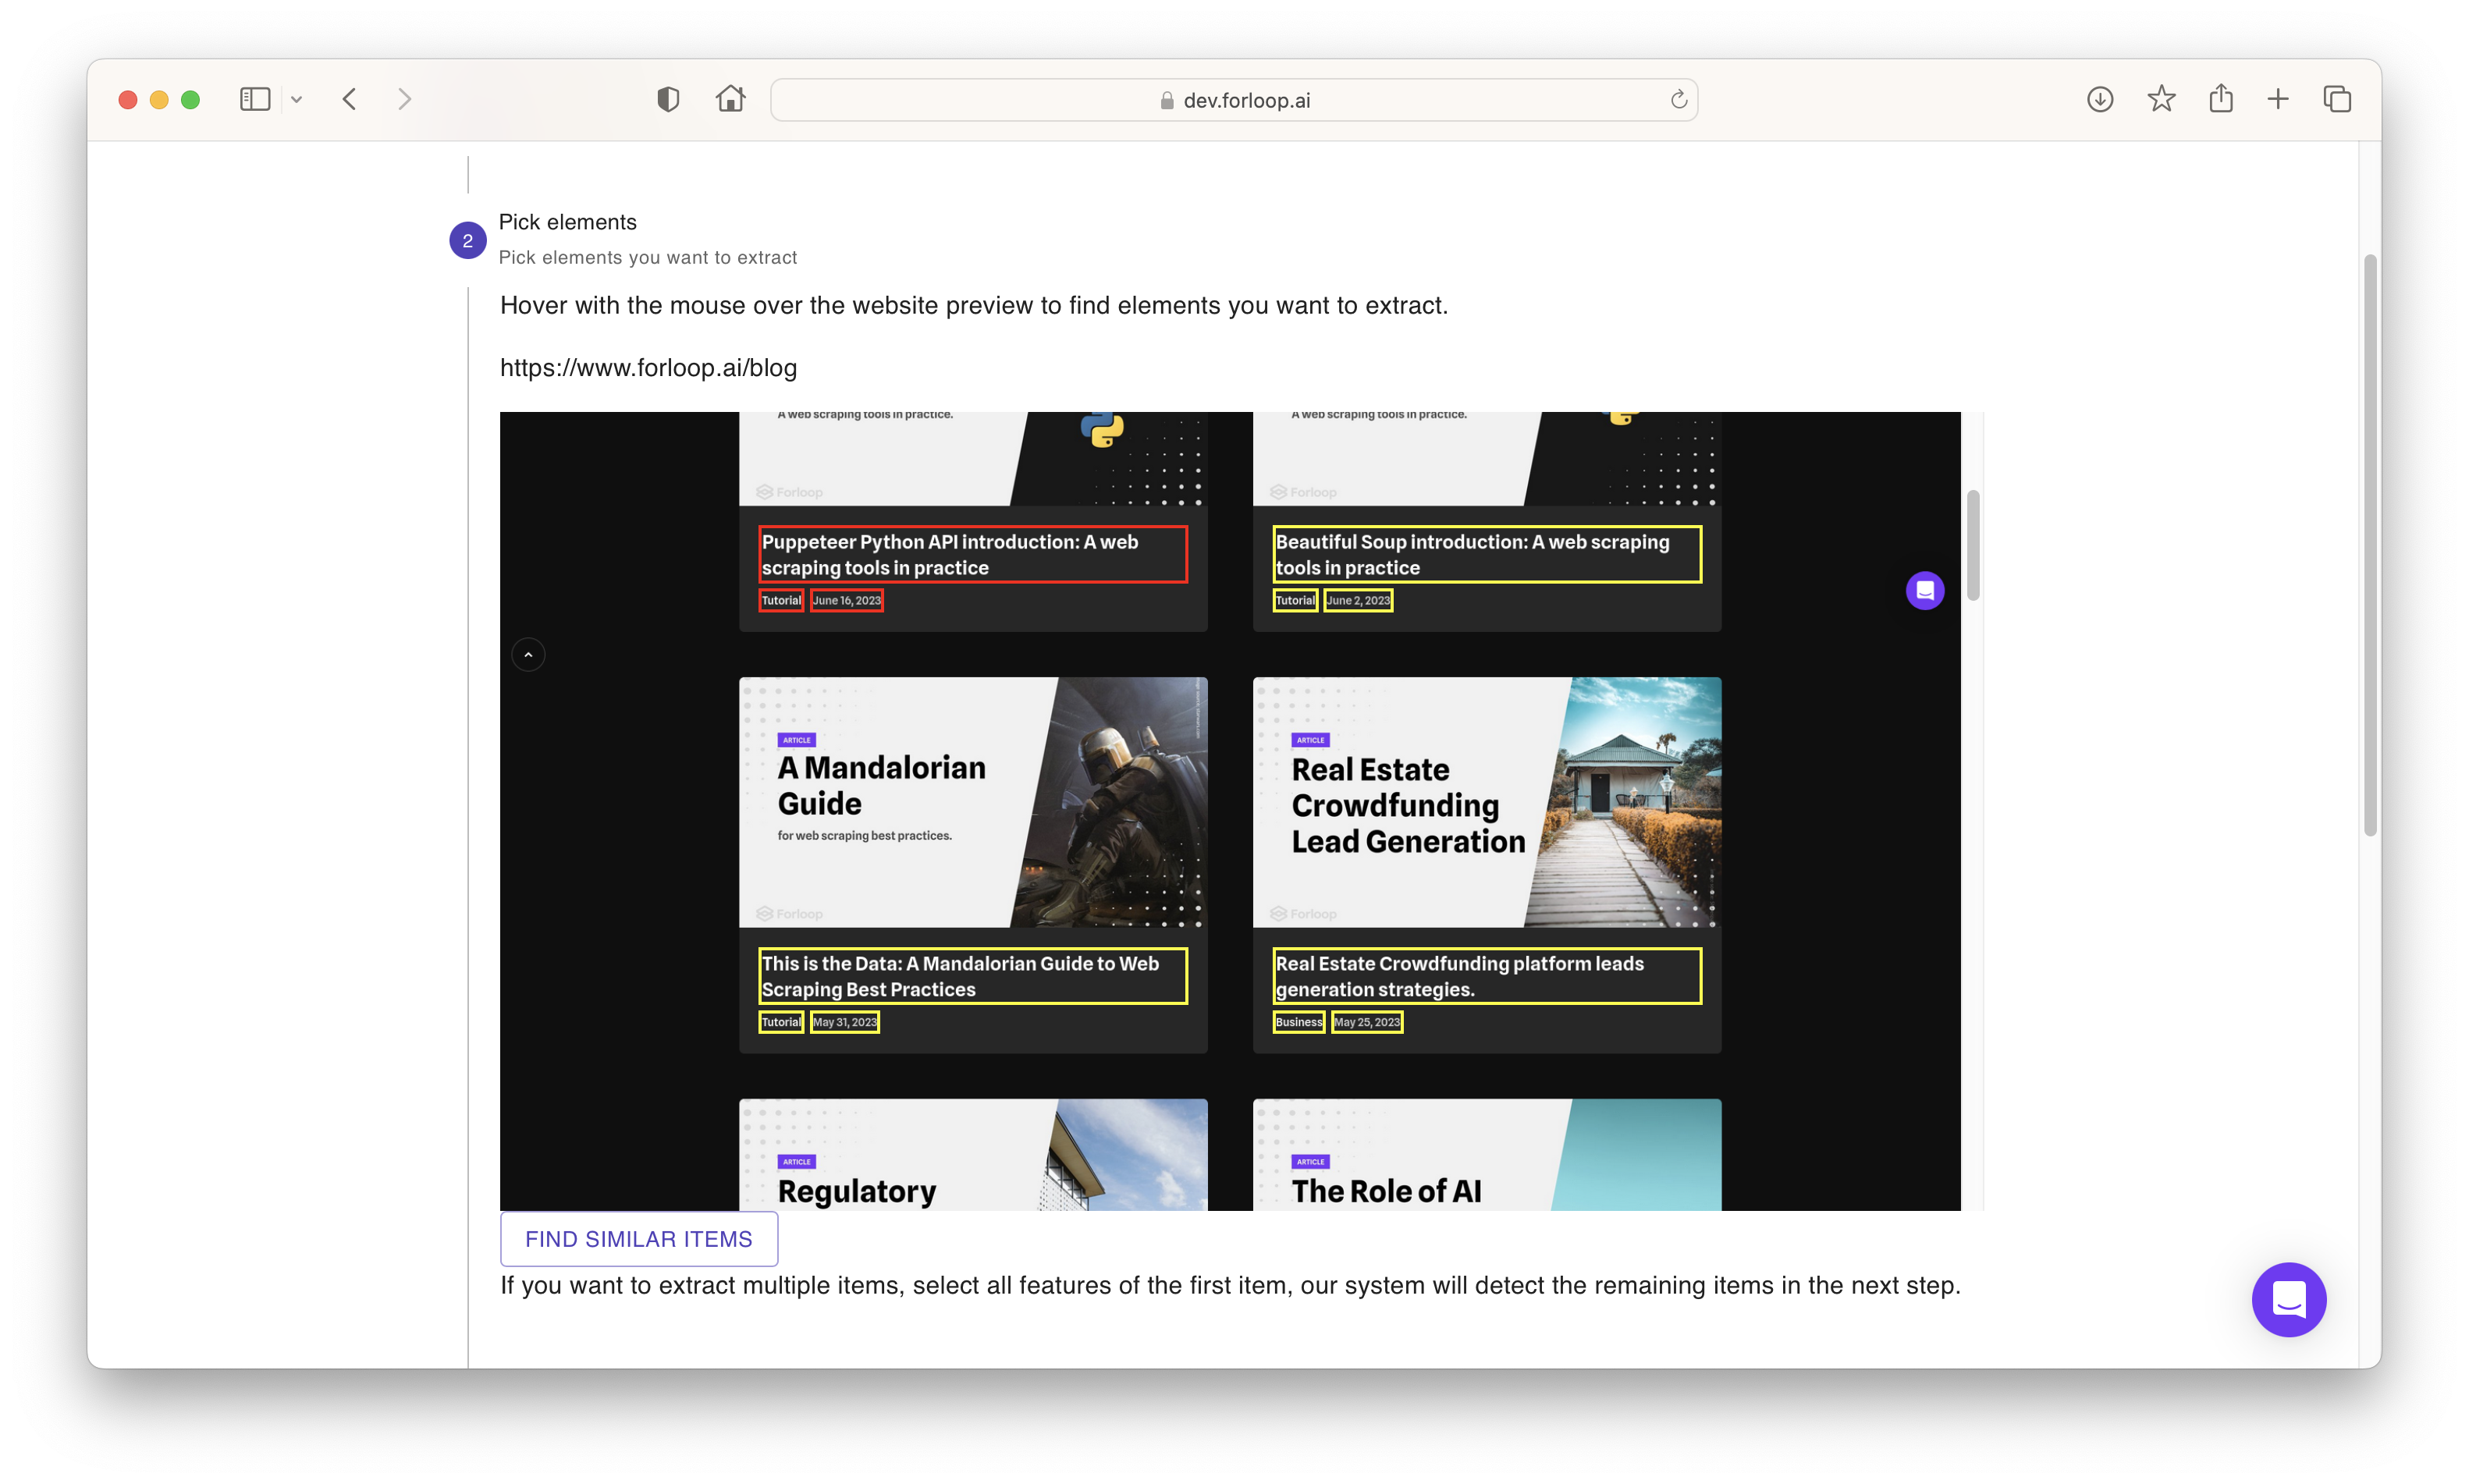
If you want to select all elements of a certain type (for example, the titles of all articles listed on the blog), there’s no need to manually select each one individually. Instead, you can select just one element of that type, then click on FIND SIMILAR ITEMS, and let Forloop take care of the rest.
All similar items selected by Forloop will be marked by yellow rectangles.
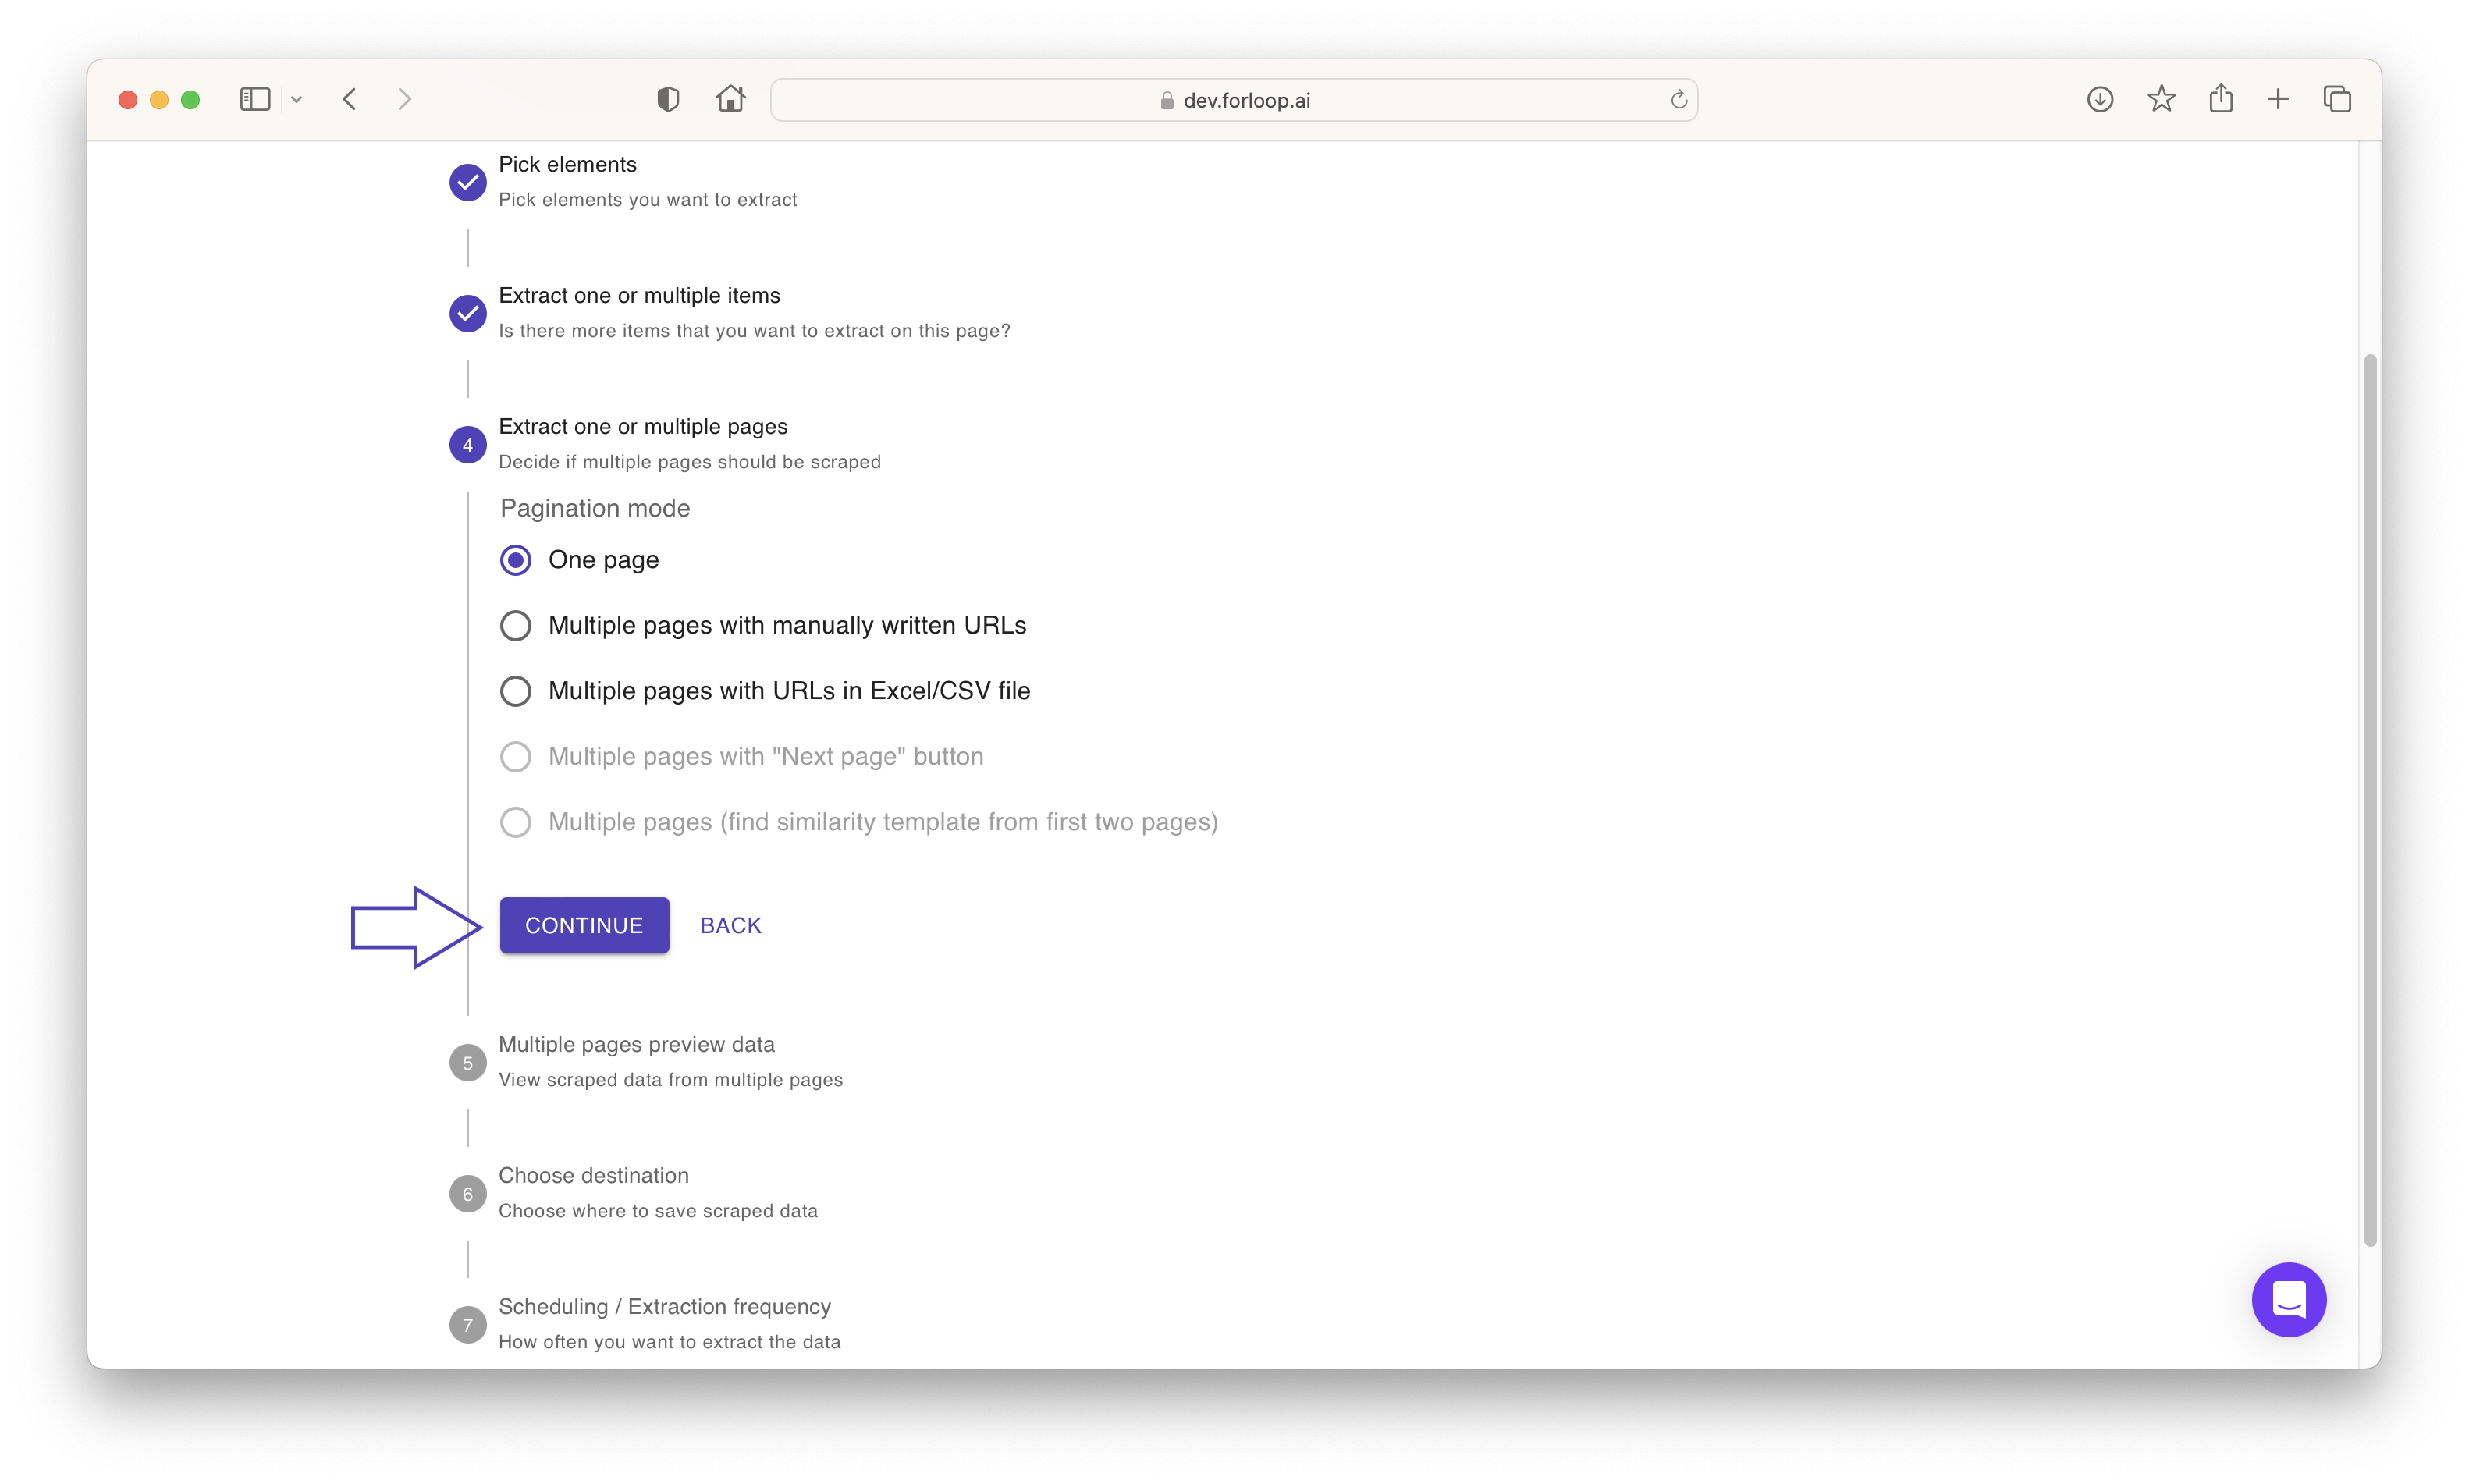
Step 4 - Pagination mode
At this stage, you can choose whether you want to scrape only the single page of the website you entered or multiple pages. To include more pages, you have the option to enter the URLs manually or import them from a CSV file. In our example, we focused on scraping a single page, but feel free to explore other options and experiment with different settings.
Step 5 - Choose destination
Now that you have the data, the next step is to determine where you would like to store it. Currently, two options are available:
Save the data locally to a CSV file.
Store the data in a Google Sheet.
In our example, we chose the Google Sheet option. To proceed with this option, you will need an existing Google Sheet that is set to be shared with anyone who has the link.
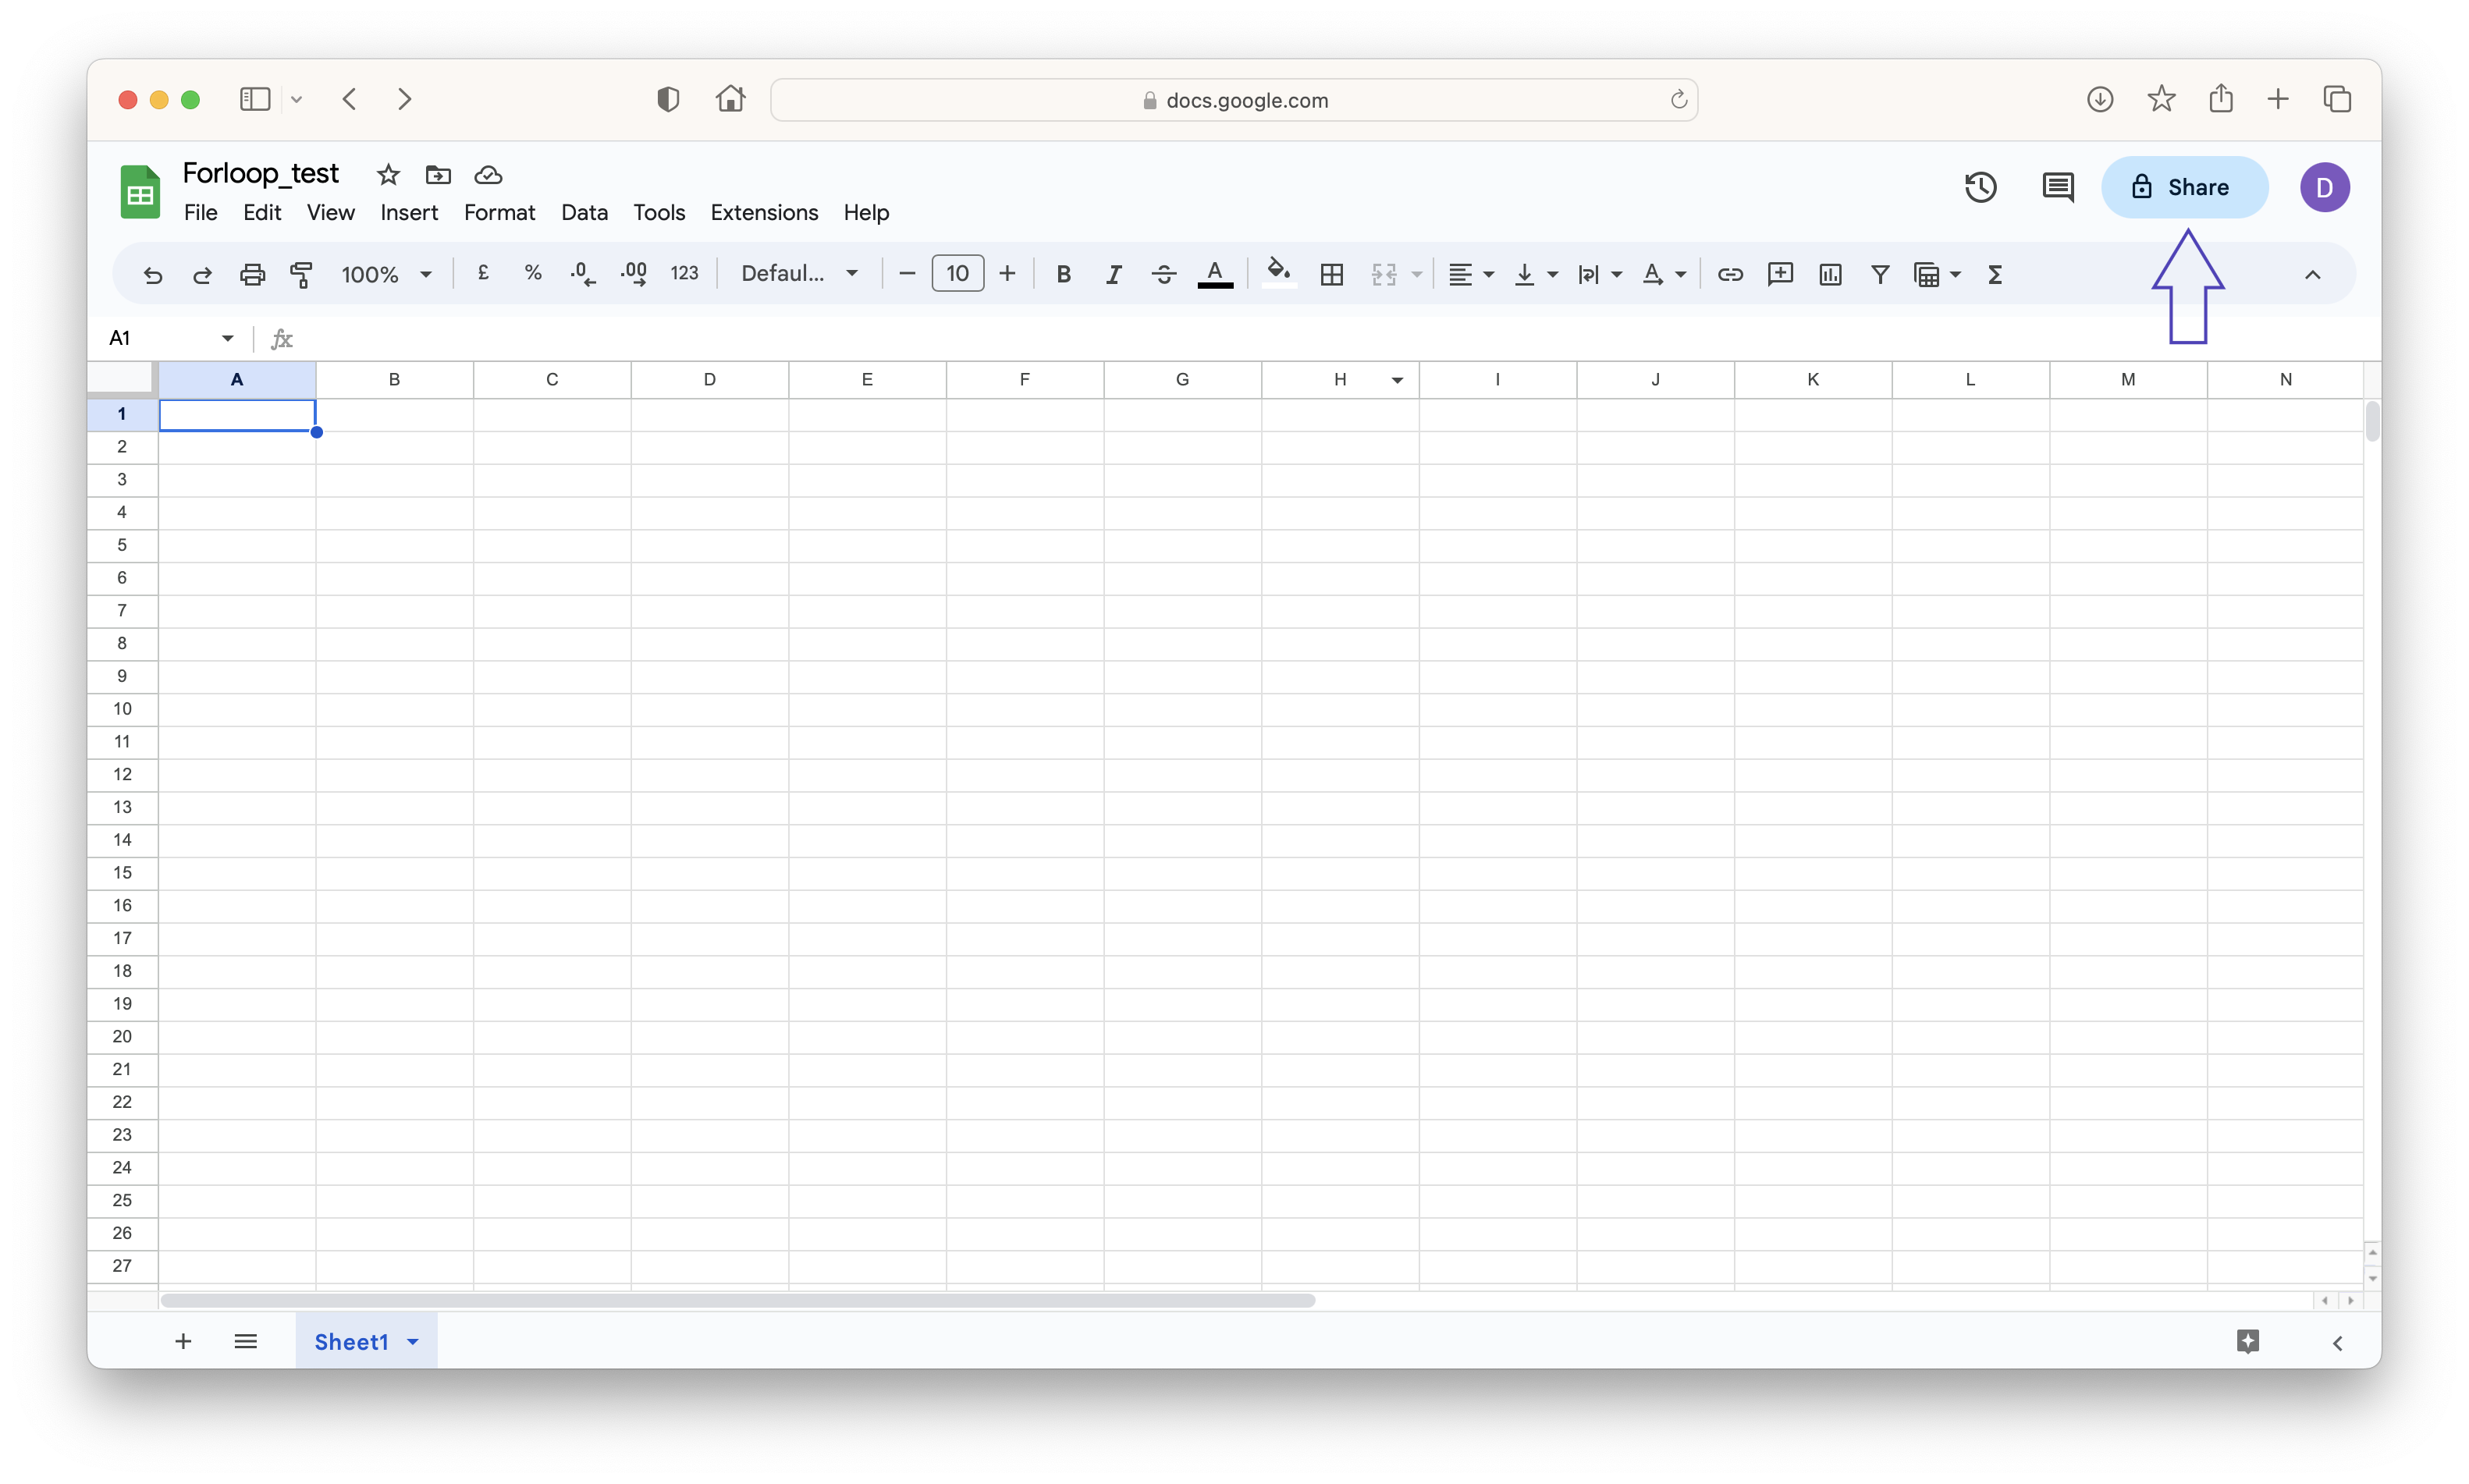
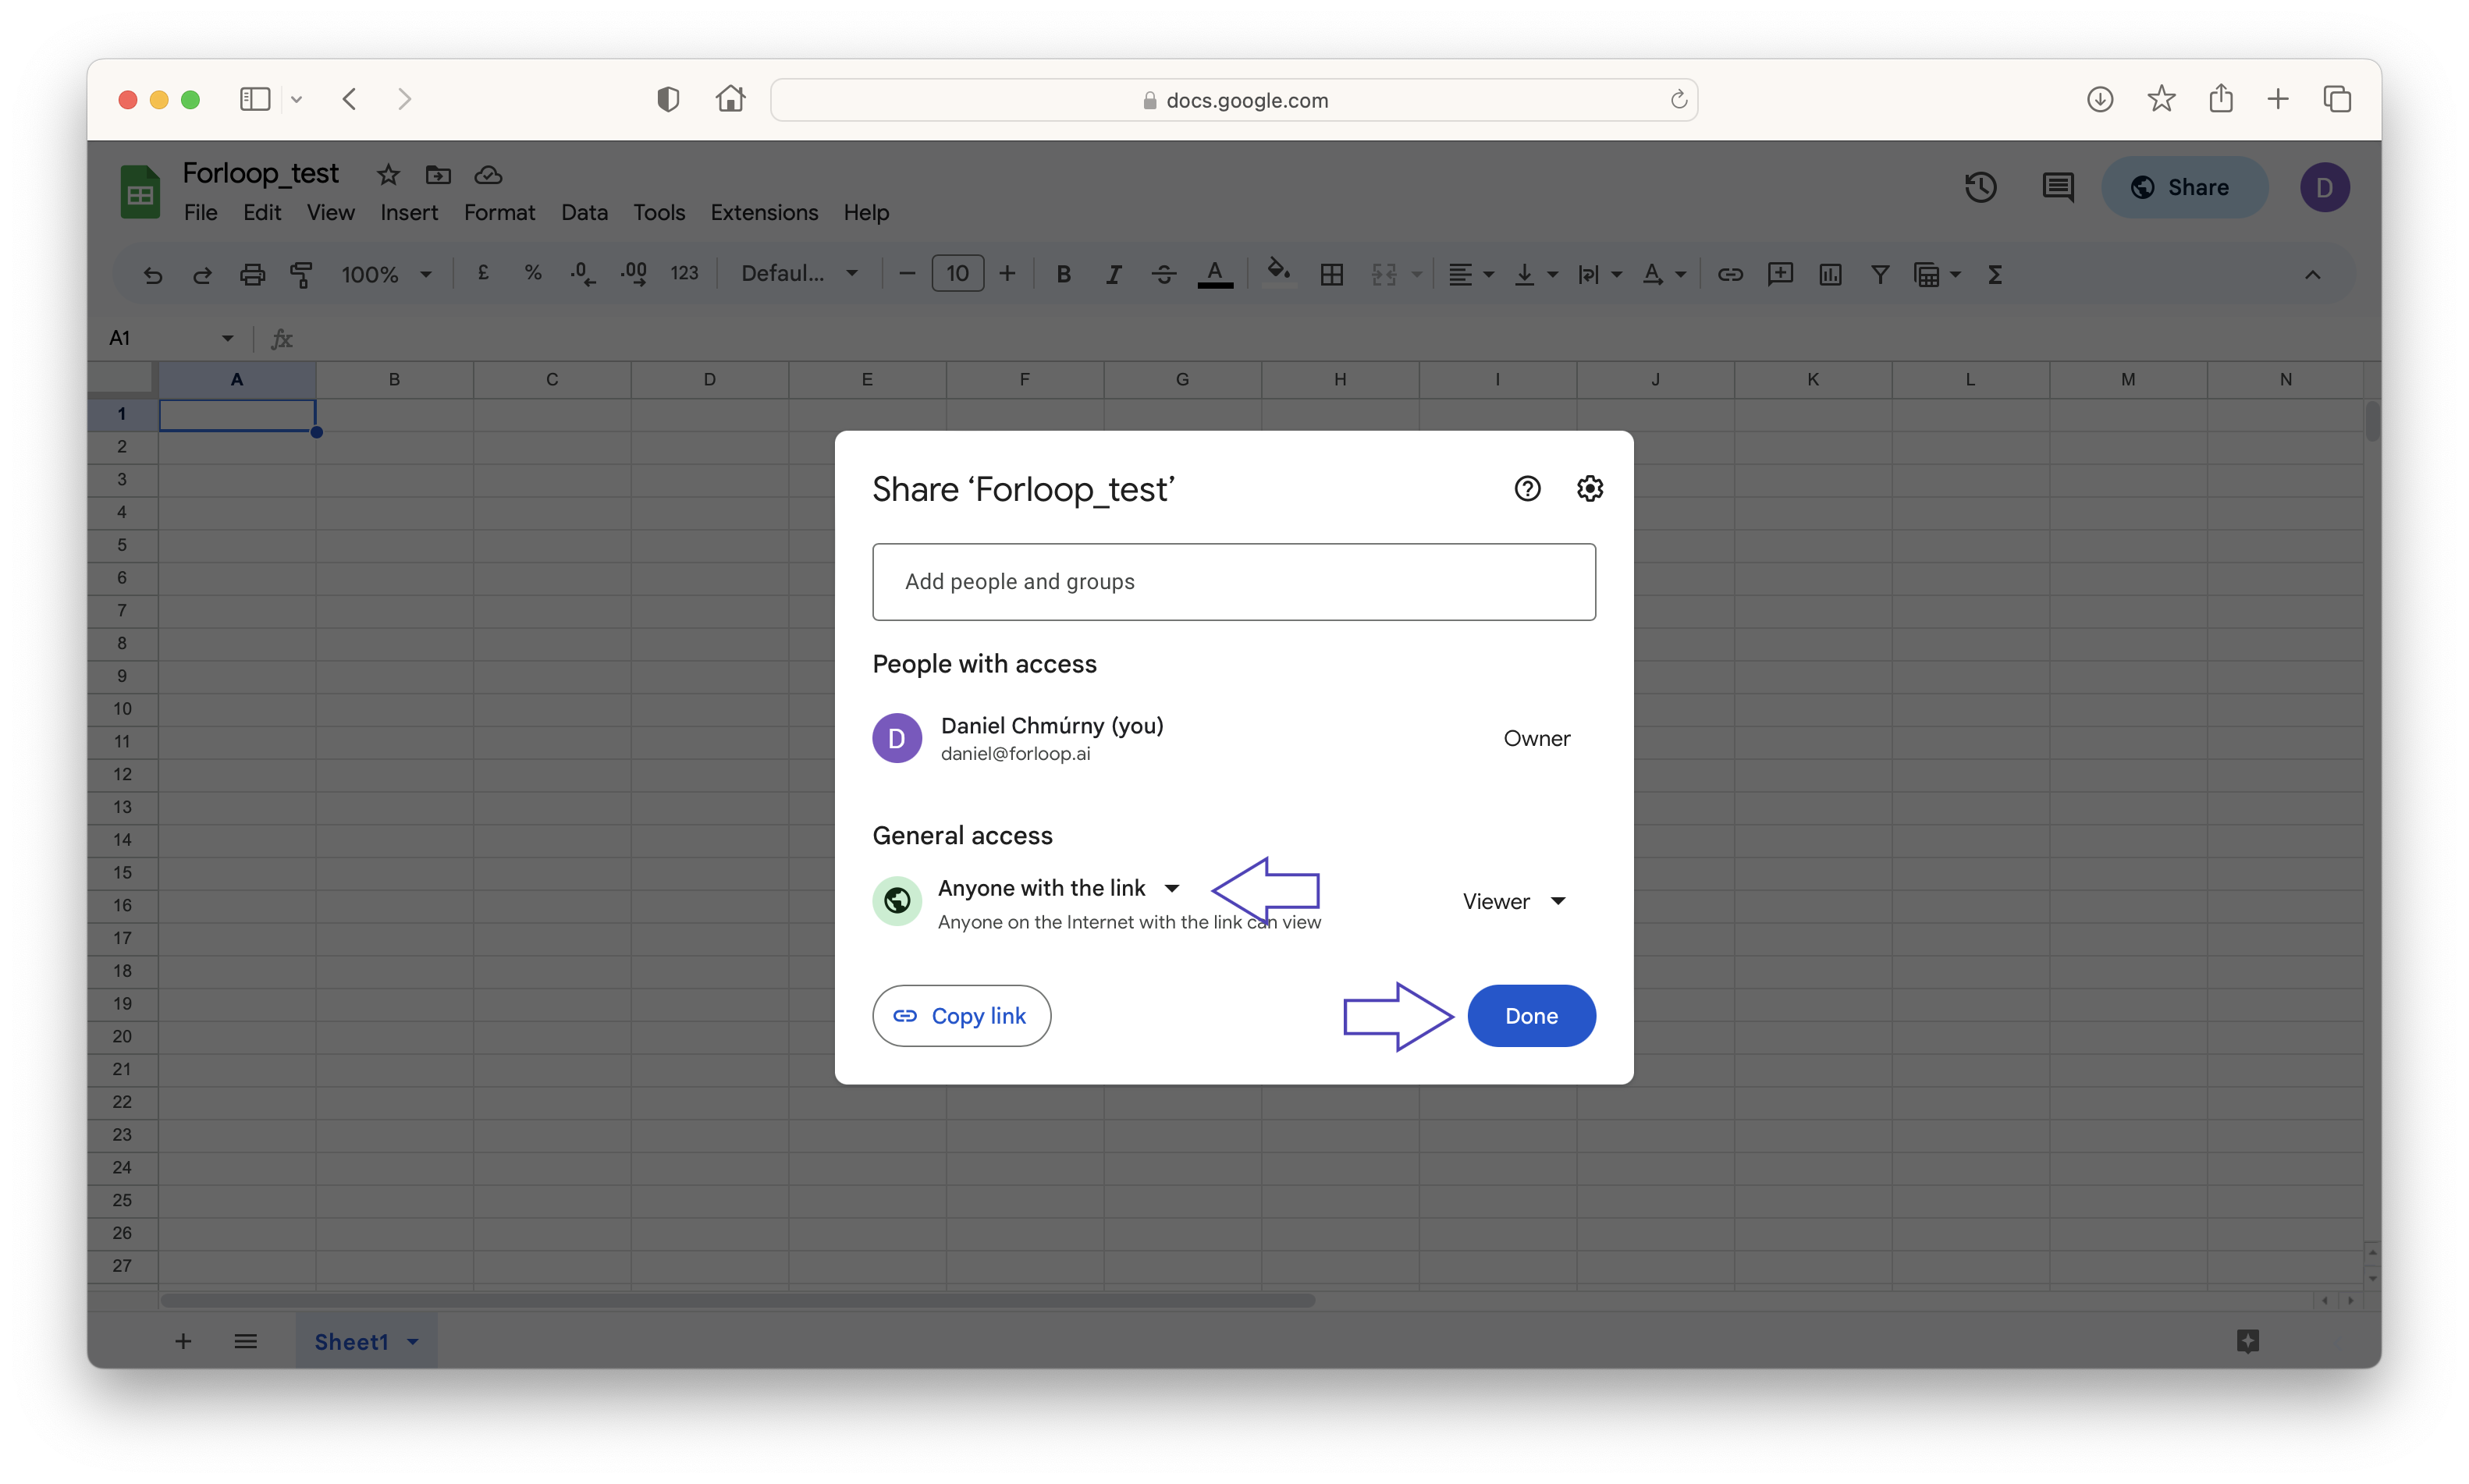
After setting up the Google sheet all you have to do is pasting it’s URL and the data are on their way! 🚀
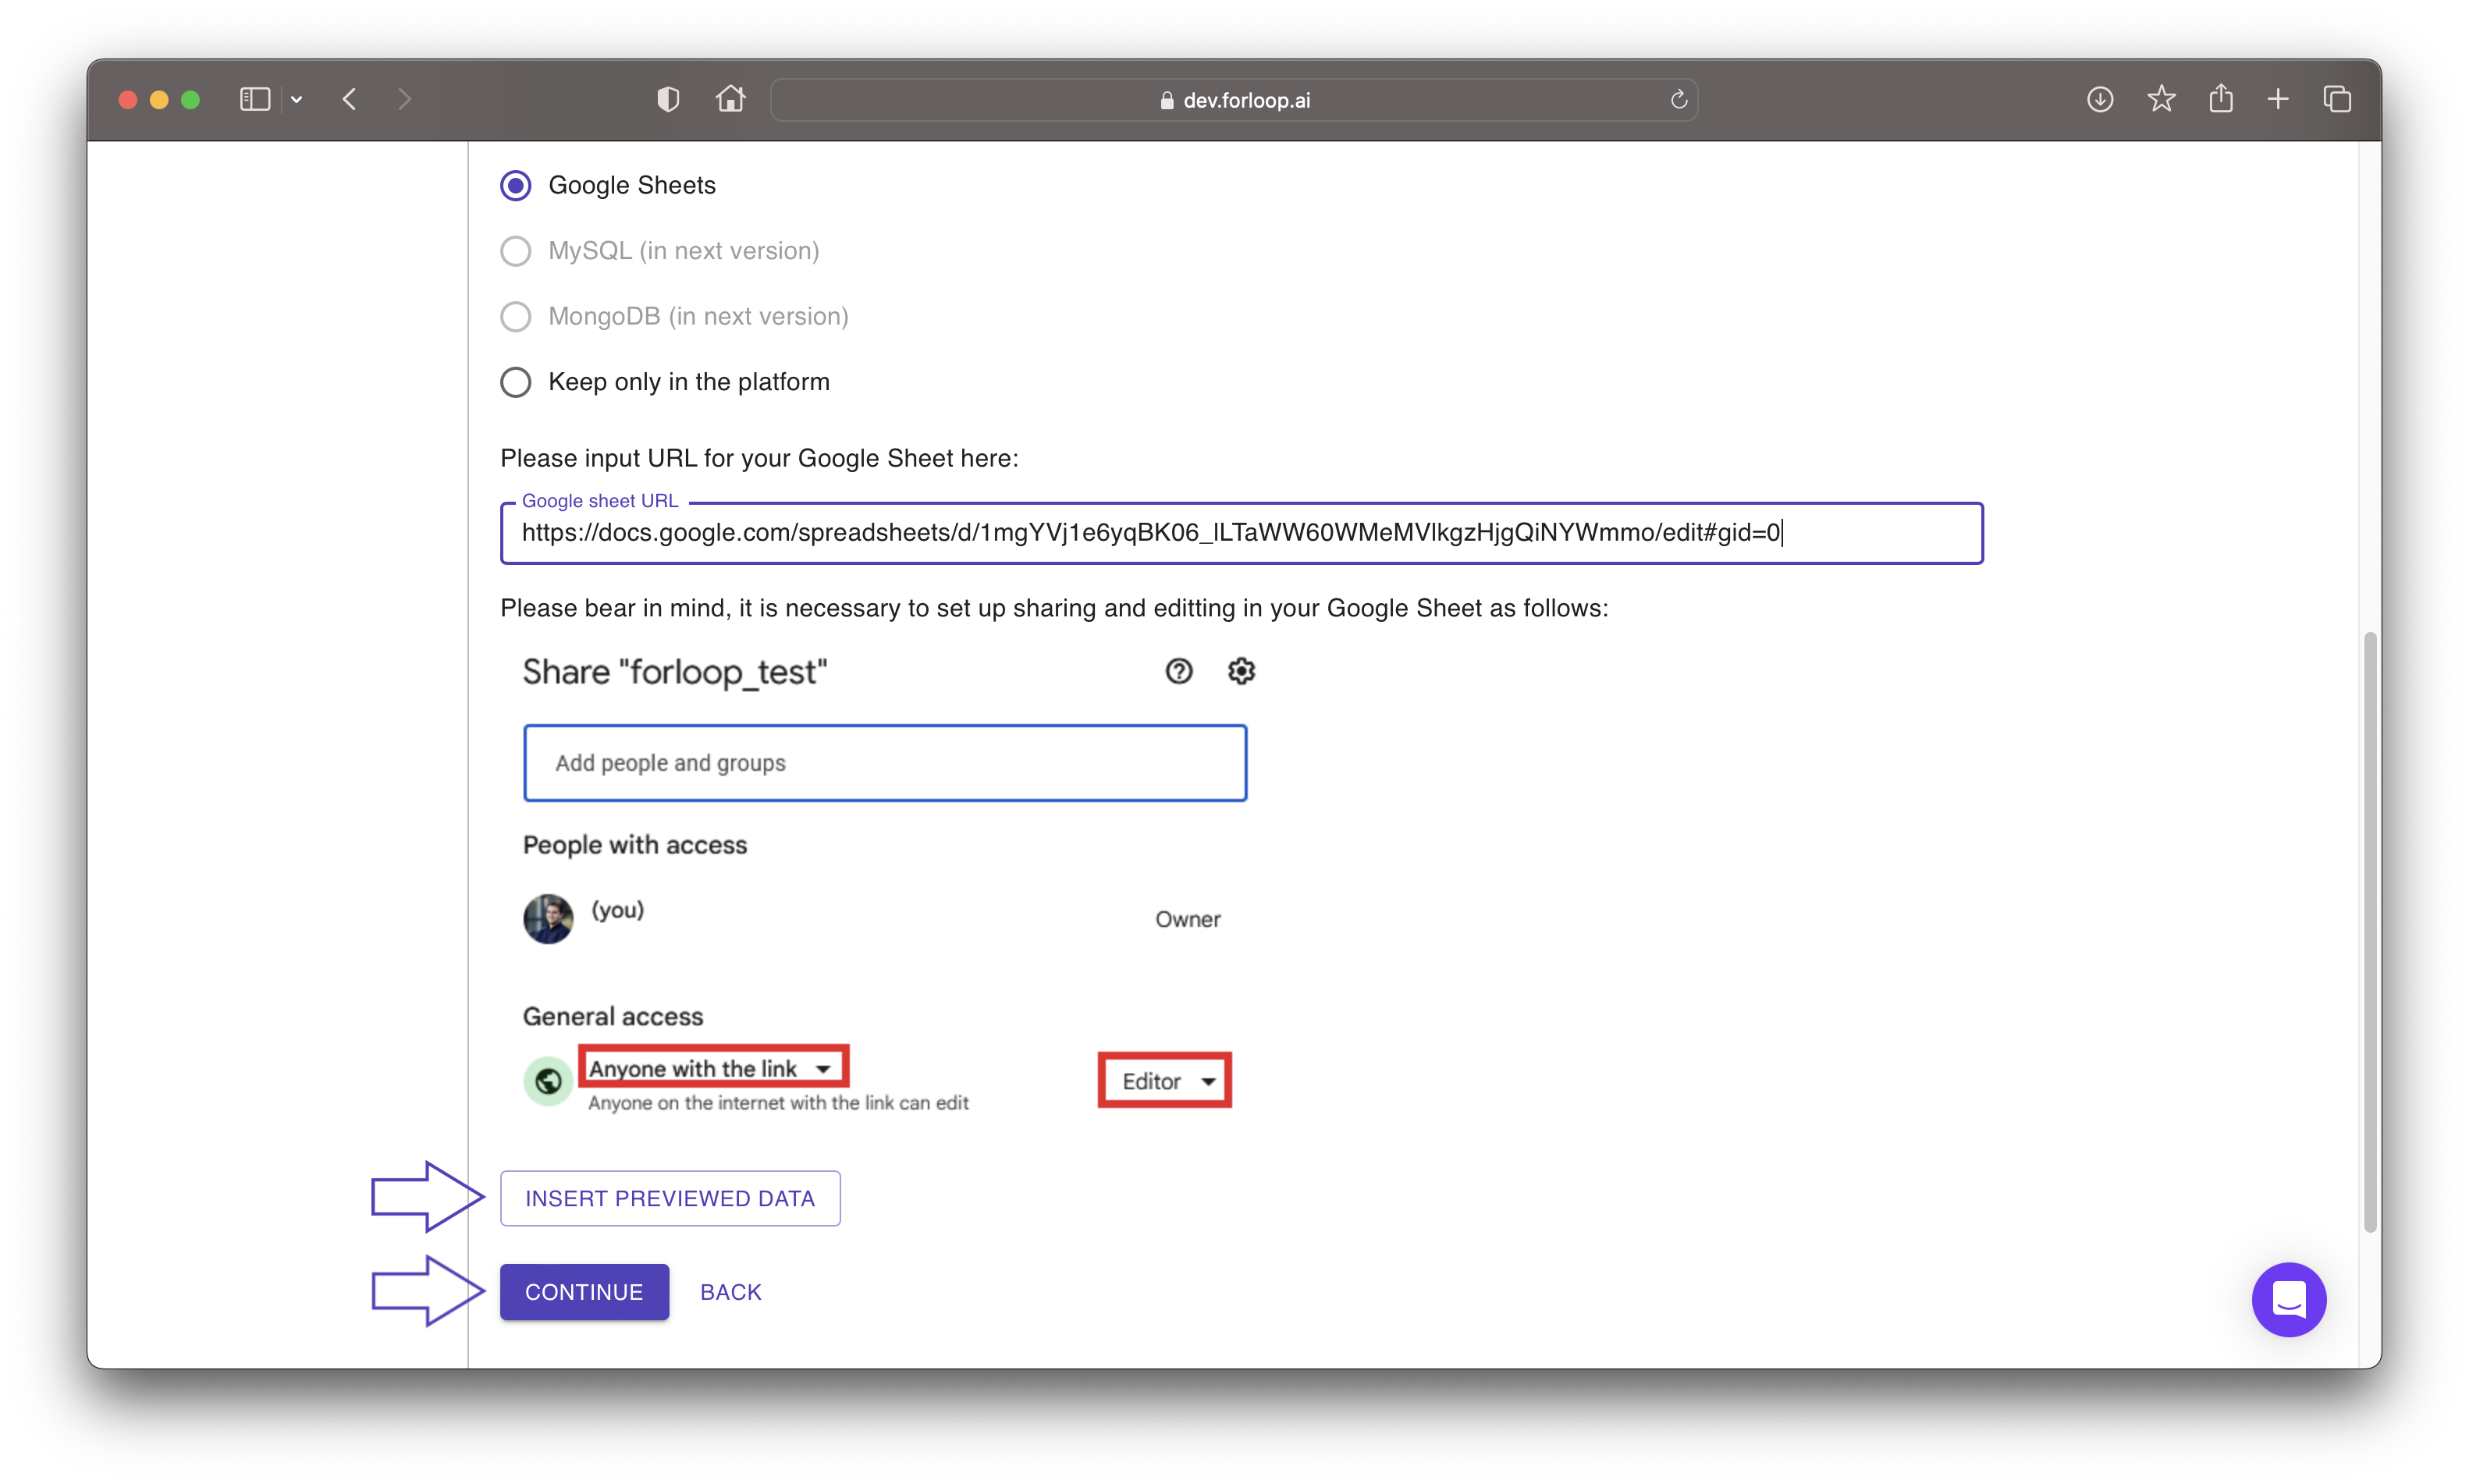
Insert previewed data to Google sheet and continue to the final step.
Step 6 - Finalize pipeline
Congratulations! You have successfully completed your first quest ⚔️🧙♂️. Now, it’s time to claim your well-deserved reward! Your reward is a complete pipeline of the entire configuration process you just completed, awaiting you in the platform. So, without further ado, click that continue button, collect your reward, and embark on another mighty quest by exploring the platform! 🐉
Get to Know Forloop
Okay, so you’ve got your copy of Forloop installed or a browser with the cloud version opened, you are registered, loged-in, maybe energized by succesfully finishing the tutorial and… now what?
Forloop greets you with a nice clean working grid accompanied by all kinds of buttons doing all kinds of useful things. But how to get a grip of all of this? Let’s take a little tour!
Tip
If you are in a cloud version, continue with the following chapter. For the desktop version guide, see Meet Forloop Desktop.
Meet Forloop Cloud ☁️
Forloop Cloud can be considered as the younger sibling of Forloop Desktop. While it may not be as mature and powerful as its counterpart, it is highly motivated and continuously improving.
If you’re not a power user who enjoys delving into every feature of the tool but appreciates a beautiful design and user-friendly interface, then you’re in the right place. Meet Forloop Cloud ☁️.
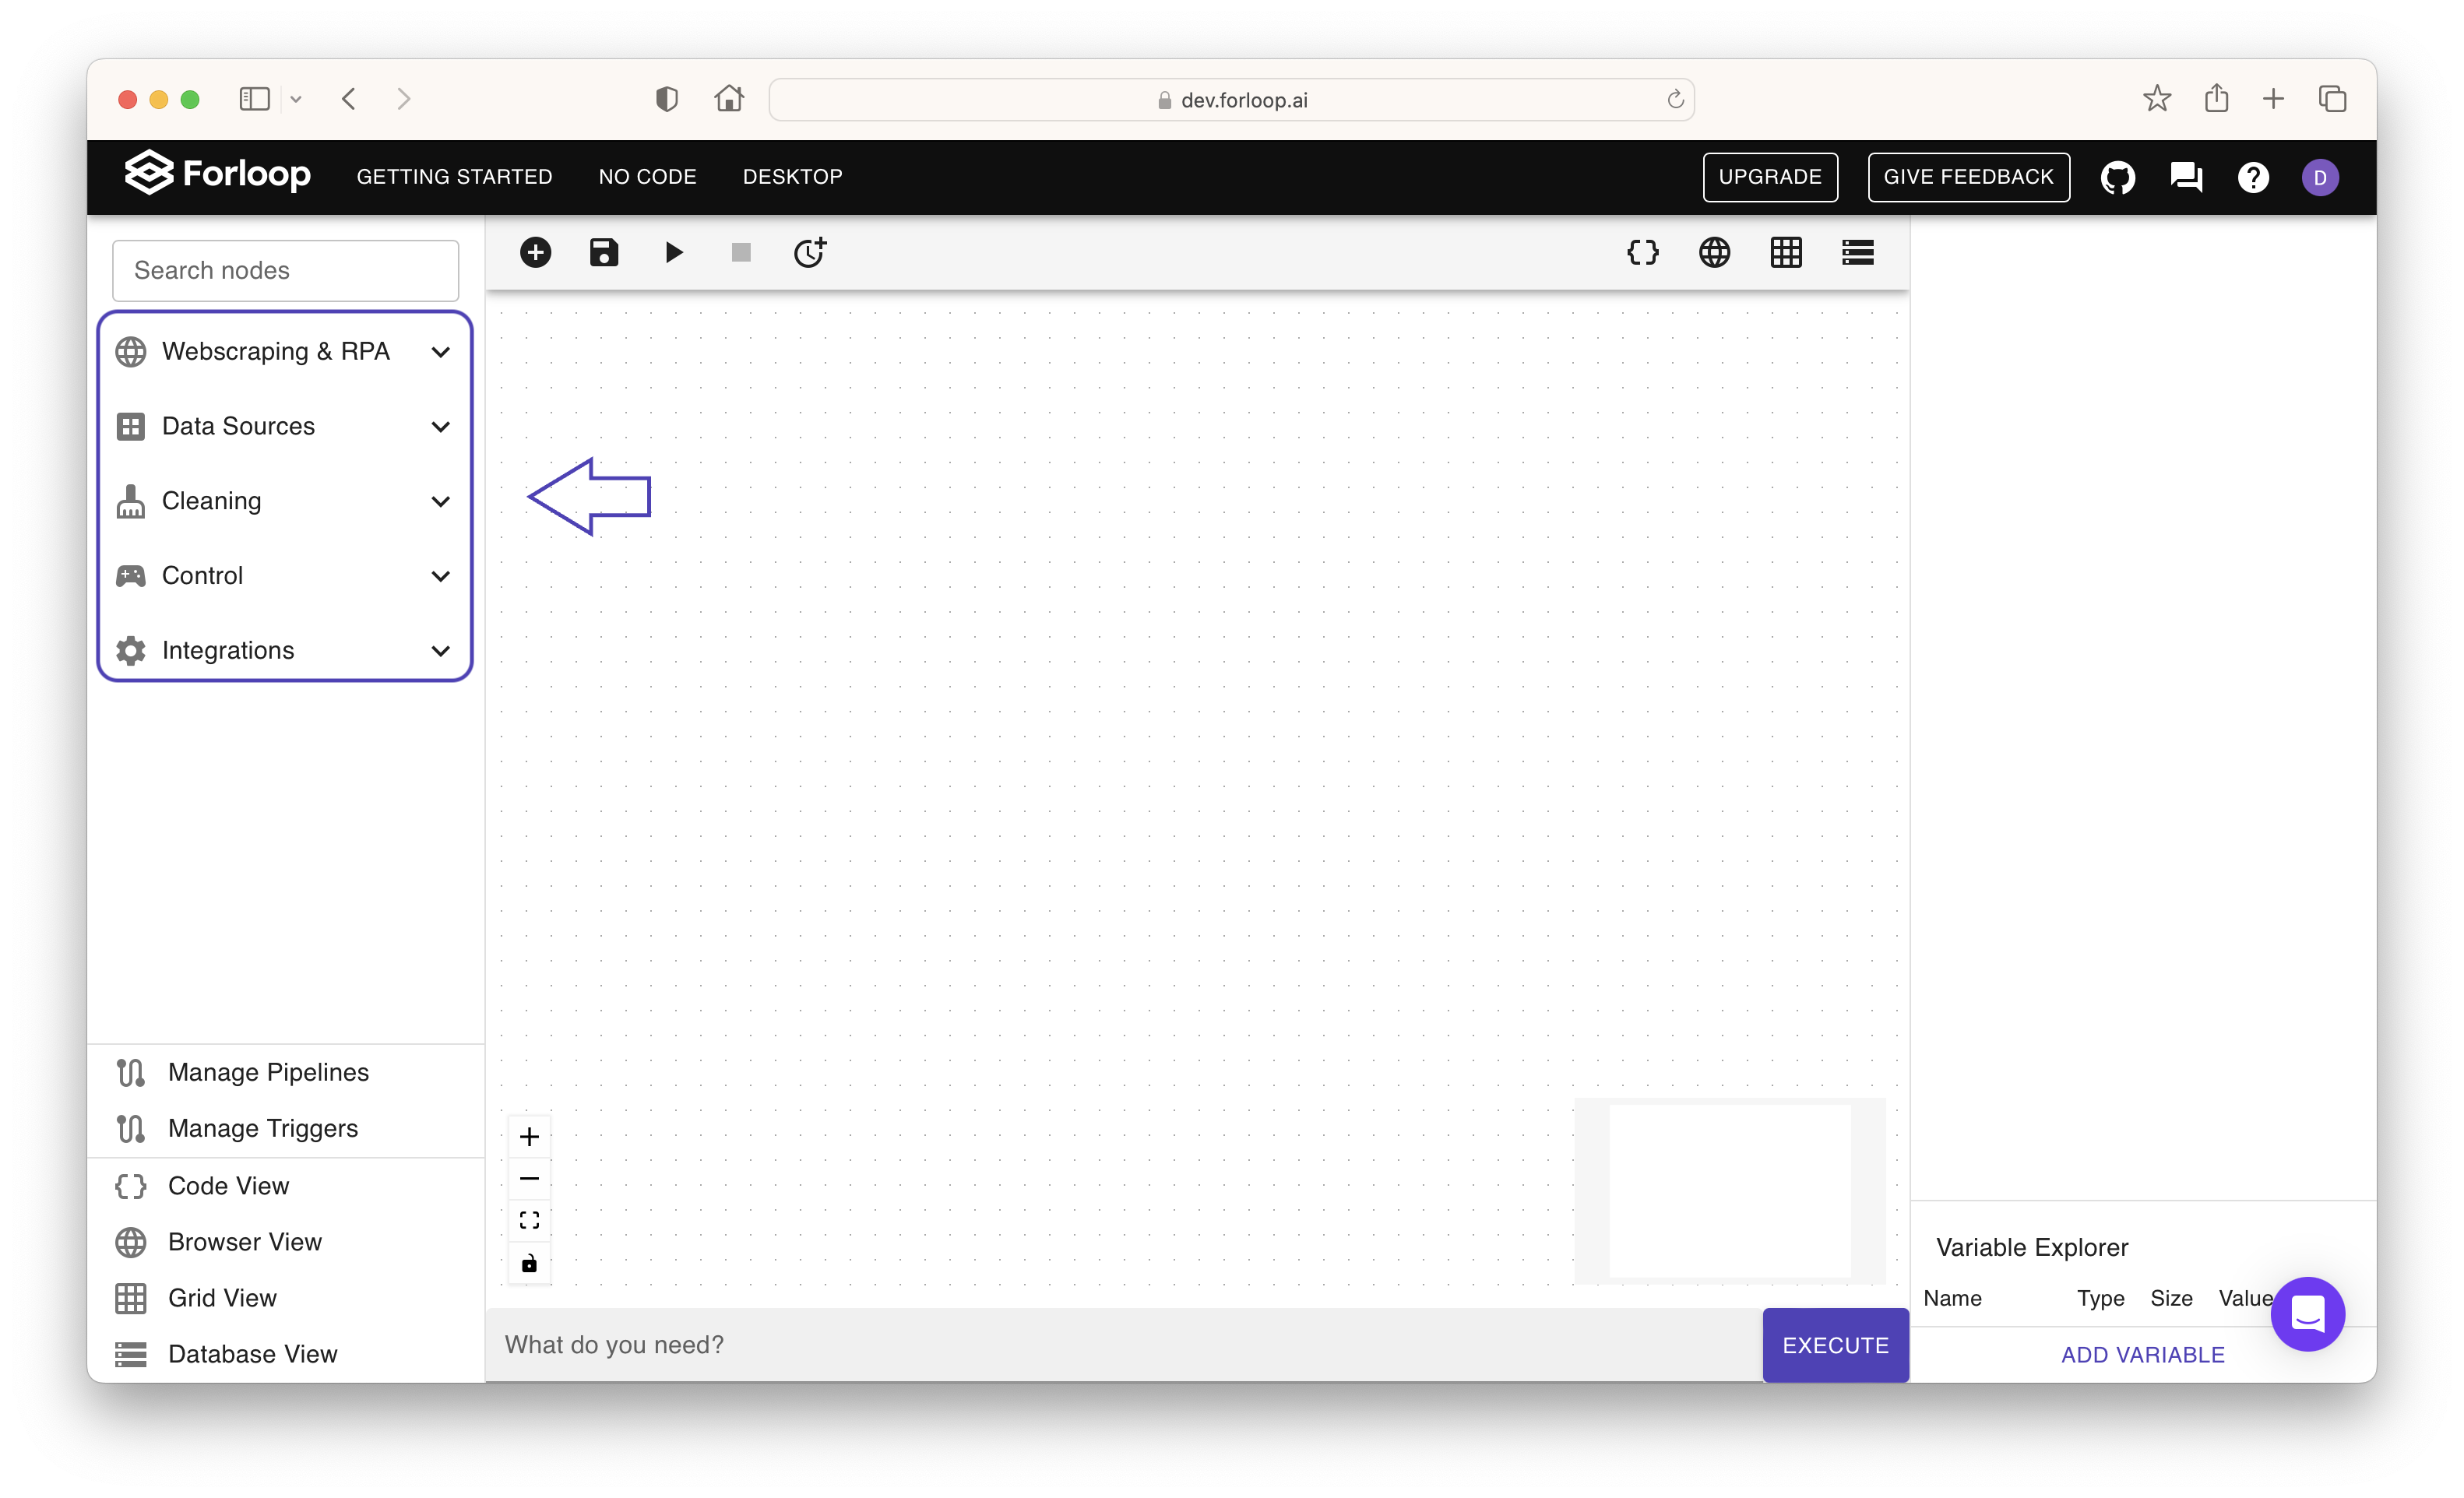
Menus and Nodes
Within the platform, you’ll find several menus, each containing numerous nodes. The organization of nodes within each menu is not random; rather, they are grouped based on their scope of usage. For example, you’ll find webscraping and RPA nodes located under the “Webscraping & RPA” menu.
We encourage you to click through the menus and explore the functionalities they offer. This will allow you to familiarize yourself with the range of available nodes and their respective purposes. Take your time to navigate through the menus and discover the capabilities of each.
Node menus in Forloop Cloud ☁️
Hint
For some general usage (how to create a node, how to connect more nodes into a pipeline etc.) see Build Your First Pipeline.
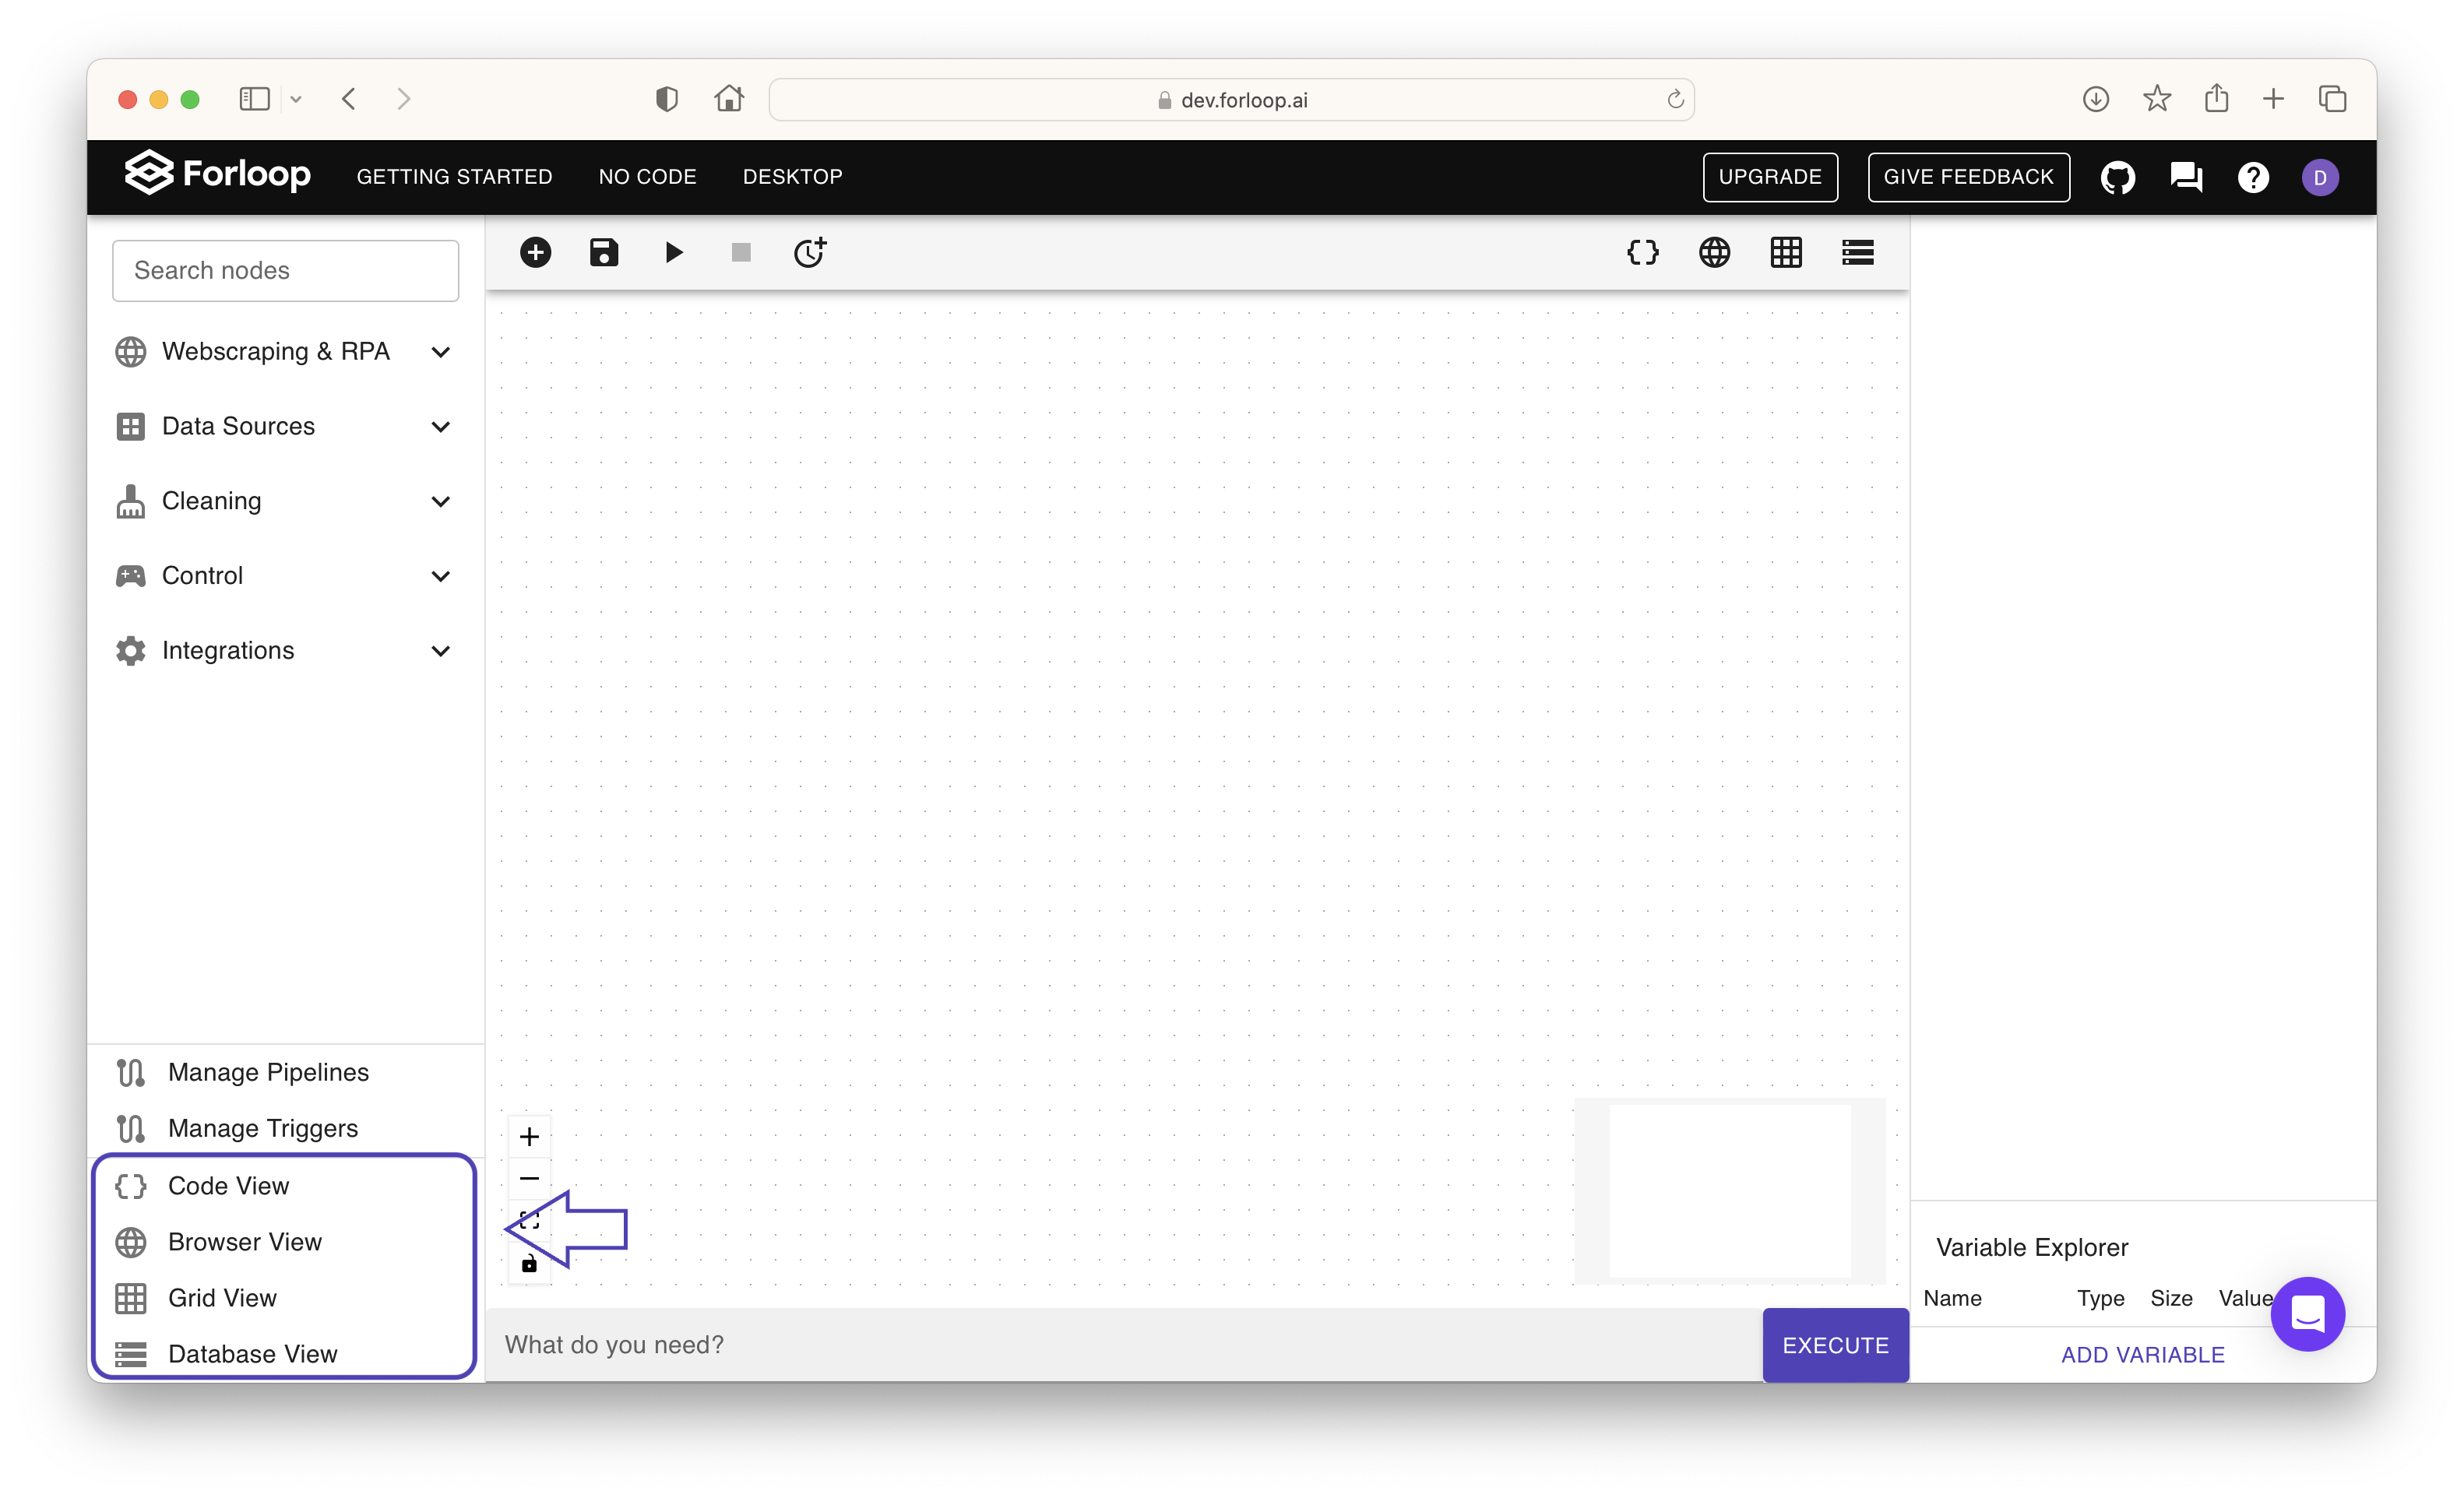
View Modes
Despite it being pretty useful, sometimes the workspace grid is not enough. In some occasions we would like to view loaded data in a data table, view loaded databases and their tables, code of the loaded nodes or scraping functionalities in a built-in browser. Luckily, all of these cases are covered by View buttons!
View modes in Forloop Cloud ☁️
In addition, not only do they add some additional viewing options but they offer additional functionalities as well! See:
Code View chapter to find out how Forloop builds a bridge between code and no-code
Browser View chapter to find out how you can interactively select elements of the webpage in Forloop and scrape their data contents
Grid View chapter to find out how you can view and work with data in an elegant table format
Database View chapter to find out how you can show and work with databases of various dialects
Tip
For some general usage of View options see Working with View Options.
Meet Forloop Desktop 🖥️
In the era of cloud services, the convenience of accessing applications and data online is undeniable. However, there are situations where having a locally installed software on your machine can be advantageous. If you are a power user who likes delving into every feature the platform offers or you seek stability and safety offered by a desktop app, you are at the right place. Meet Forloop Desktop 🖥️
Installation (desktop version)
Supported platforms: Windows, MacOS.
Donwnload stable release of Forloop from: http://app.forloop.ai/
Run the downloaded file to install the platform
If on Windows - do not install into Program Files folder!
Launch the platform
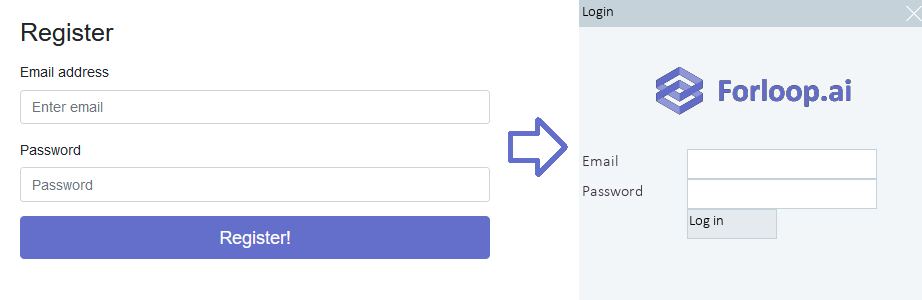
Register on http://app.forloop.ai/register (if not done before)
Use registration details to log in Forloop.ai platform
Enjoy Forloop! 🚀
Important
In case of encountering any issues during installation, please contact us.
Menus and Nodes
Within the platform, you’ll find several menus, each containing numerous nodes. The organization of nodes within each menu is not random; rather, they are grouped based on their scope of usage. For example, you’ll find webscraping and RPA nodes located under the “Webscraping & RPA” menu.
We encourage you to click through the menus and explore the functionalities they offer. This will allow you to familiarize yourself with the range of available nodes and their respective purposes. Take your time to navigate through the menus and discover the capabilities of eac
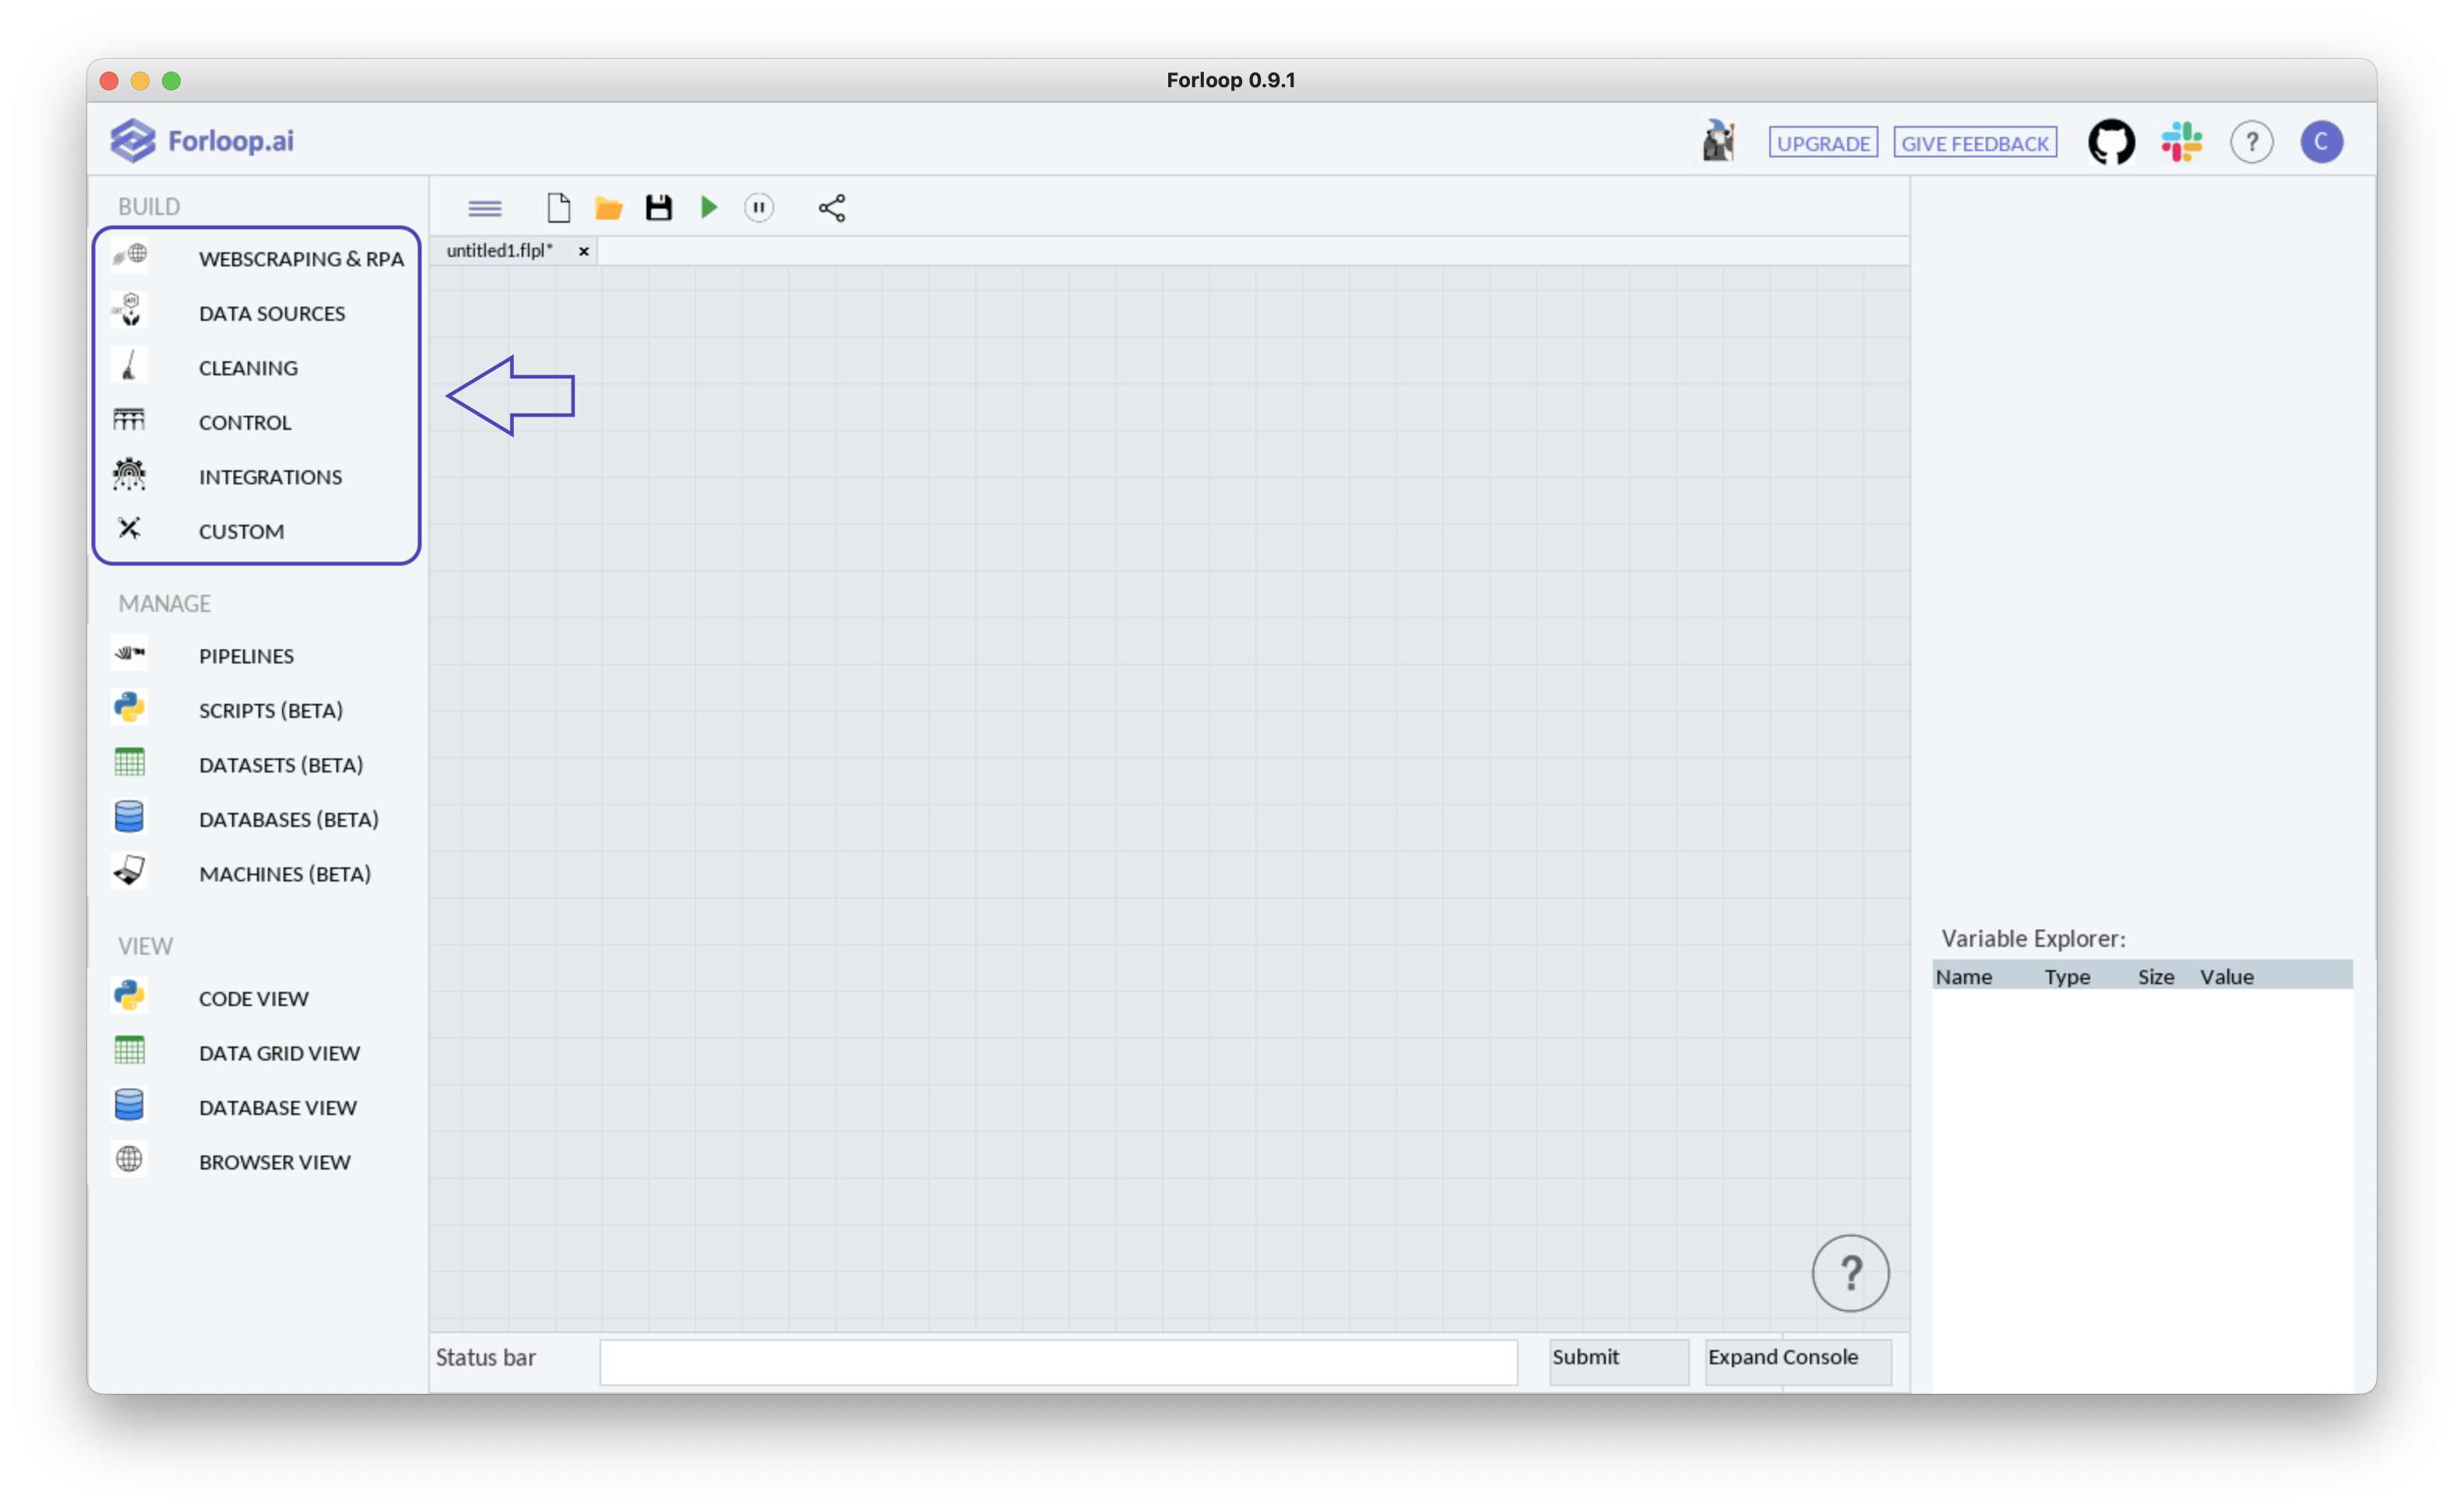
Node menus in Forloop Desktop 🖥️
Tip
For some general usage (how to create a node, how to connect more nodes into a pipeline etc.) see Build Your First Pipeline.
View Modes
Despite it being pretty useful, sometimes the workspace grid is not enough. In some occasions we would like to view loaded data in a data table, view loaded databases and their tables, code of the loaded nodes or scraping functionalities in a built-in browser. Luckily, all of these cases are covered by View buttons!
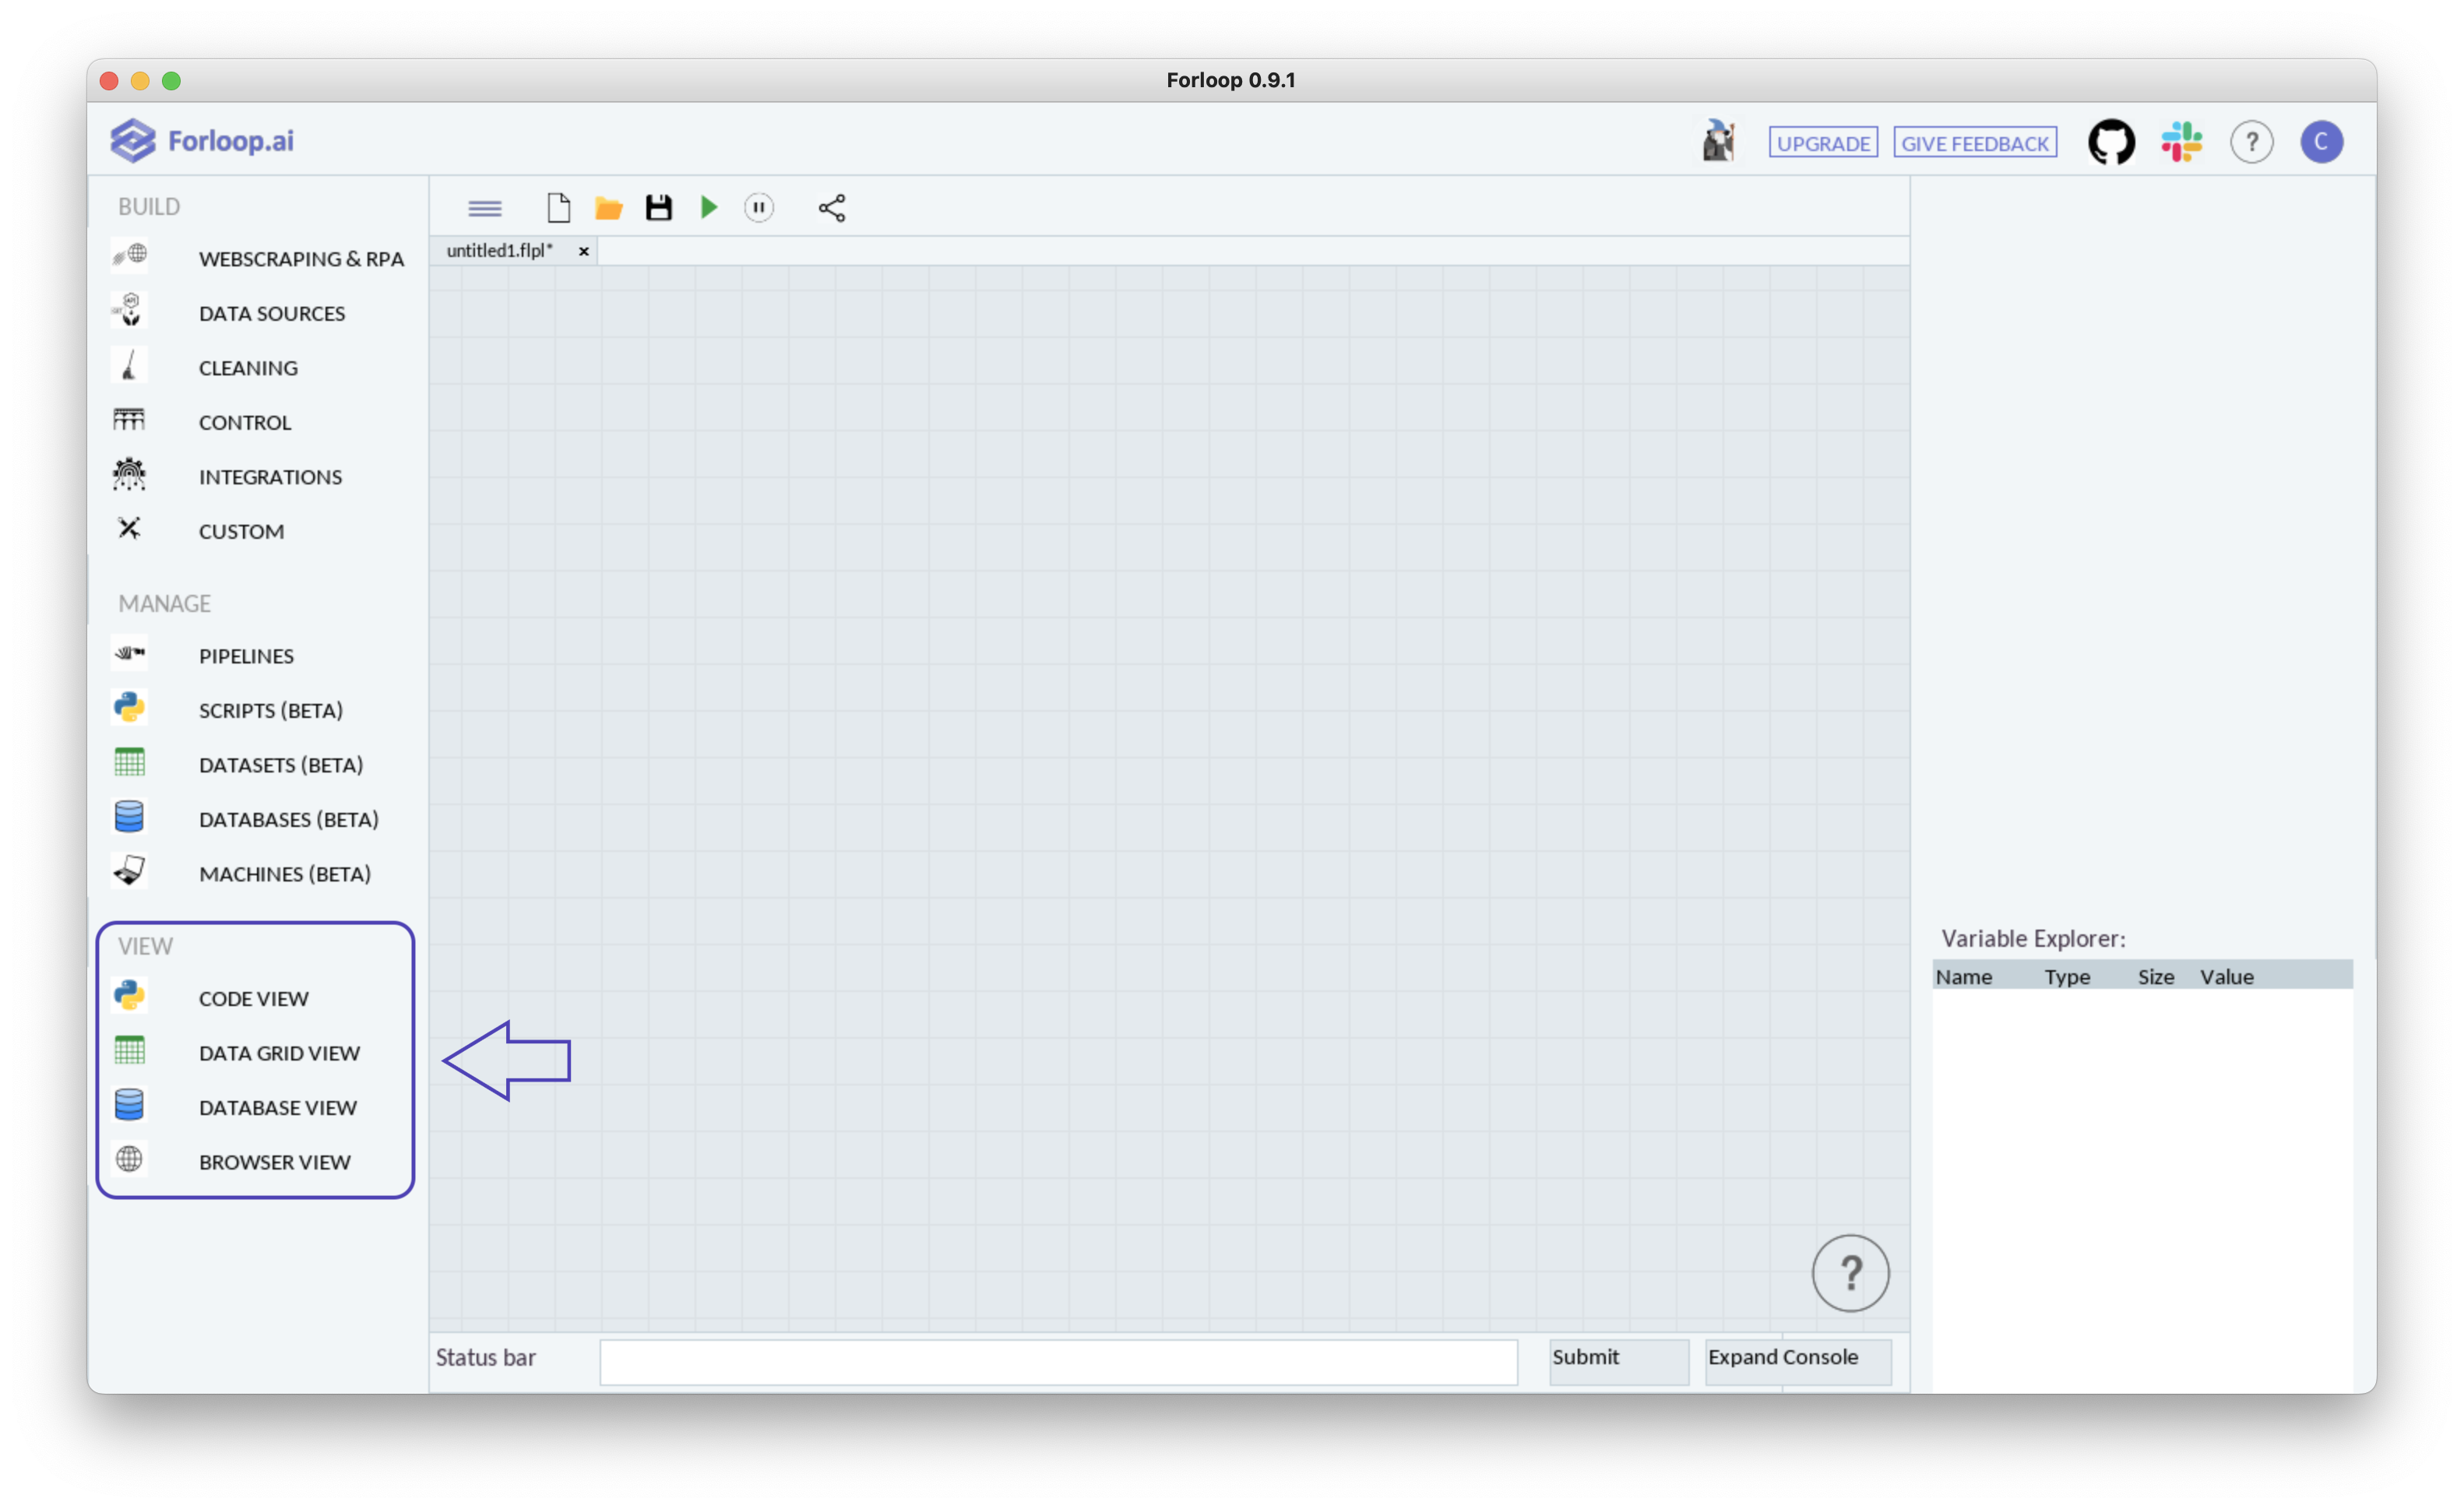
View modes in Forloop Desktop 🖥️
In addition, not only do they add some additional viewing options but they offer additional functionalities as well! See:
Code View chapter to find out how Forloop builds a bridge between code and no-code
Browser View chapter to find out how you can interactively select elements of the webpage in Forloop and scrape their data contents
Grid View chapter to find out how you can view and work with data in an elegant table format
Database View chapter to find out how you can show and work with databases of various dialects
Tip
For some general usage of View options see Working with View Options.
Variable Explorer
For storing and working with data Forloop presents the Variable Explorer. It stores data of various types (numbers, strings, lists etc.) in a form of color coded rectangles. These can be the interactively used in Forloop nodes.
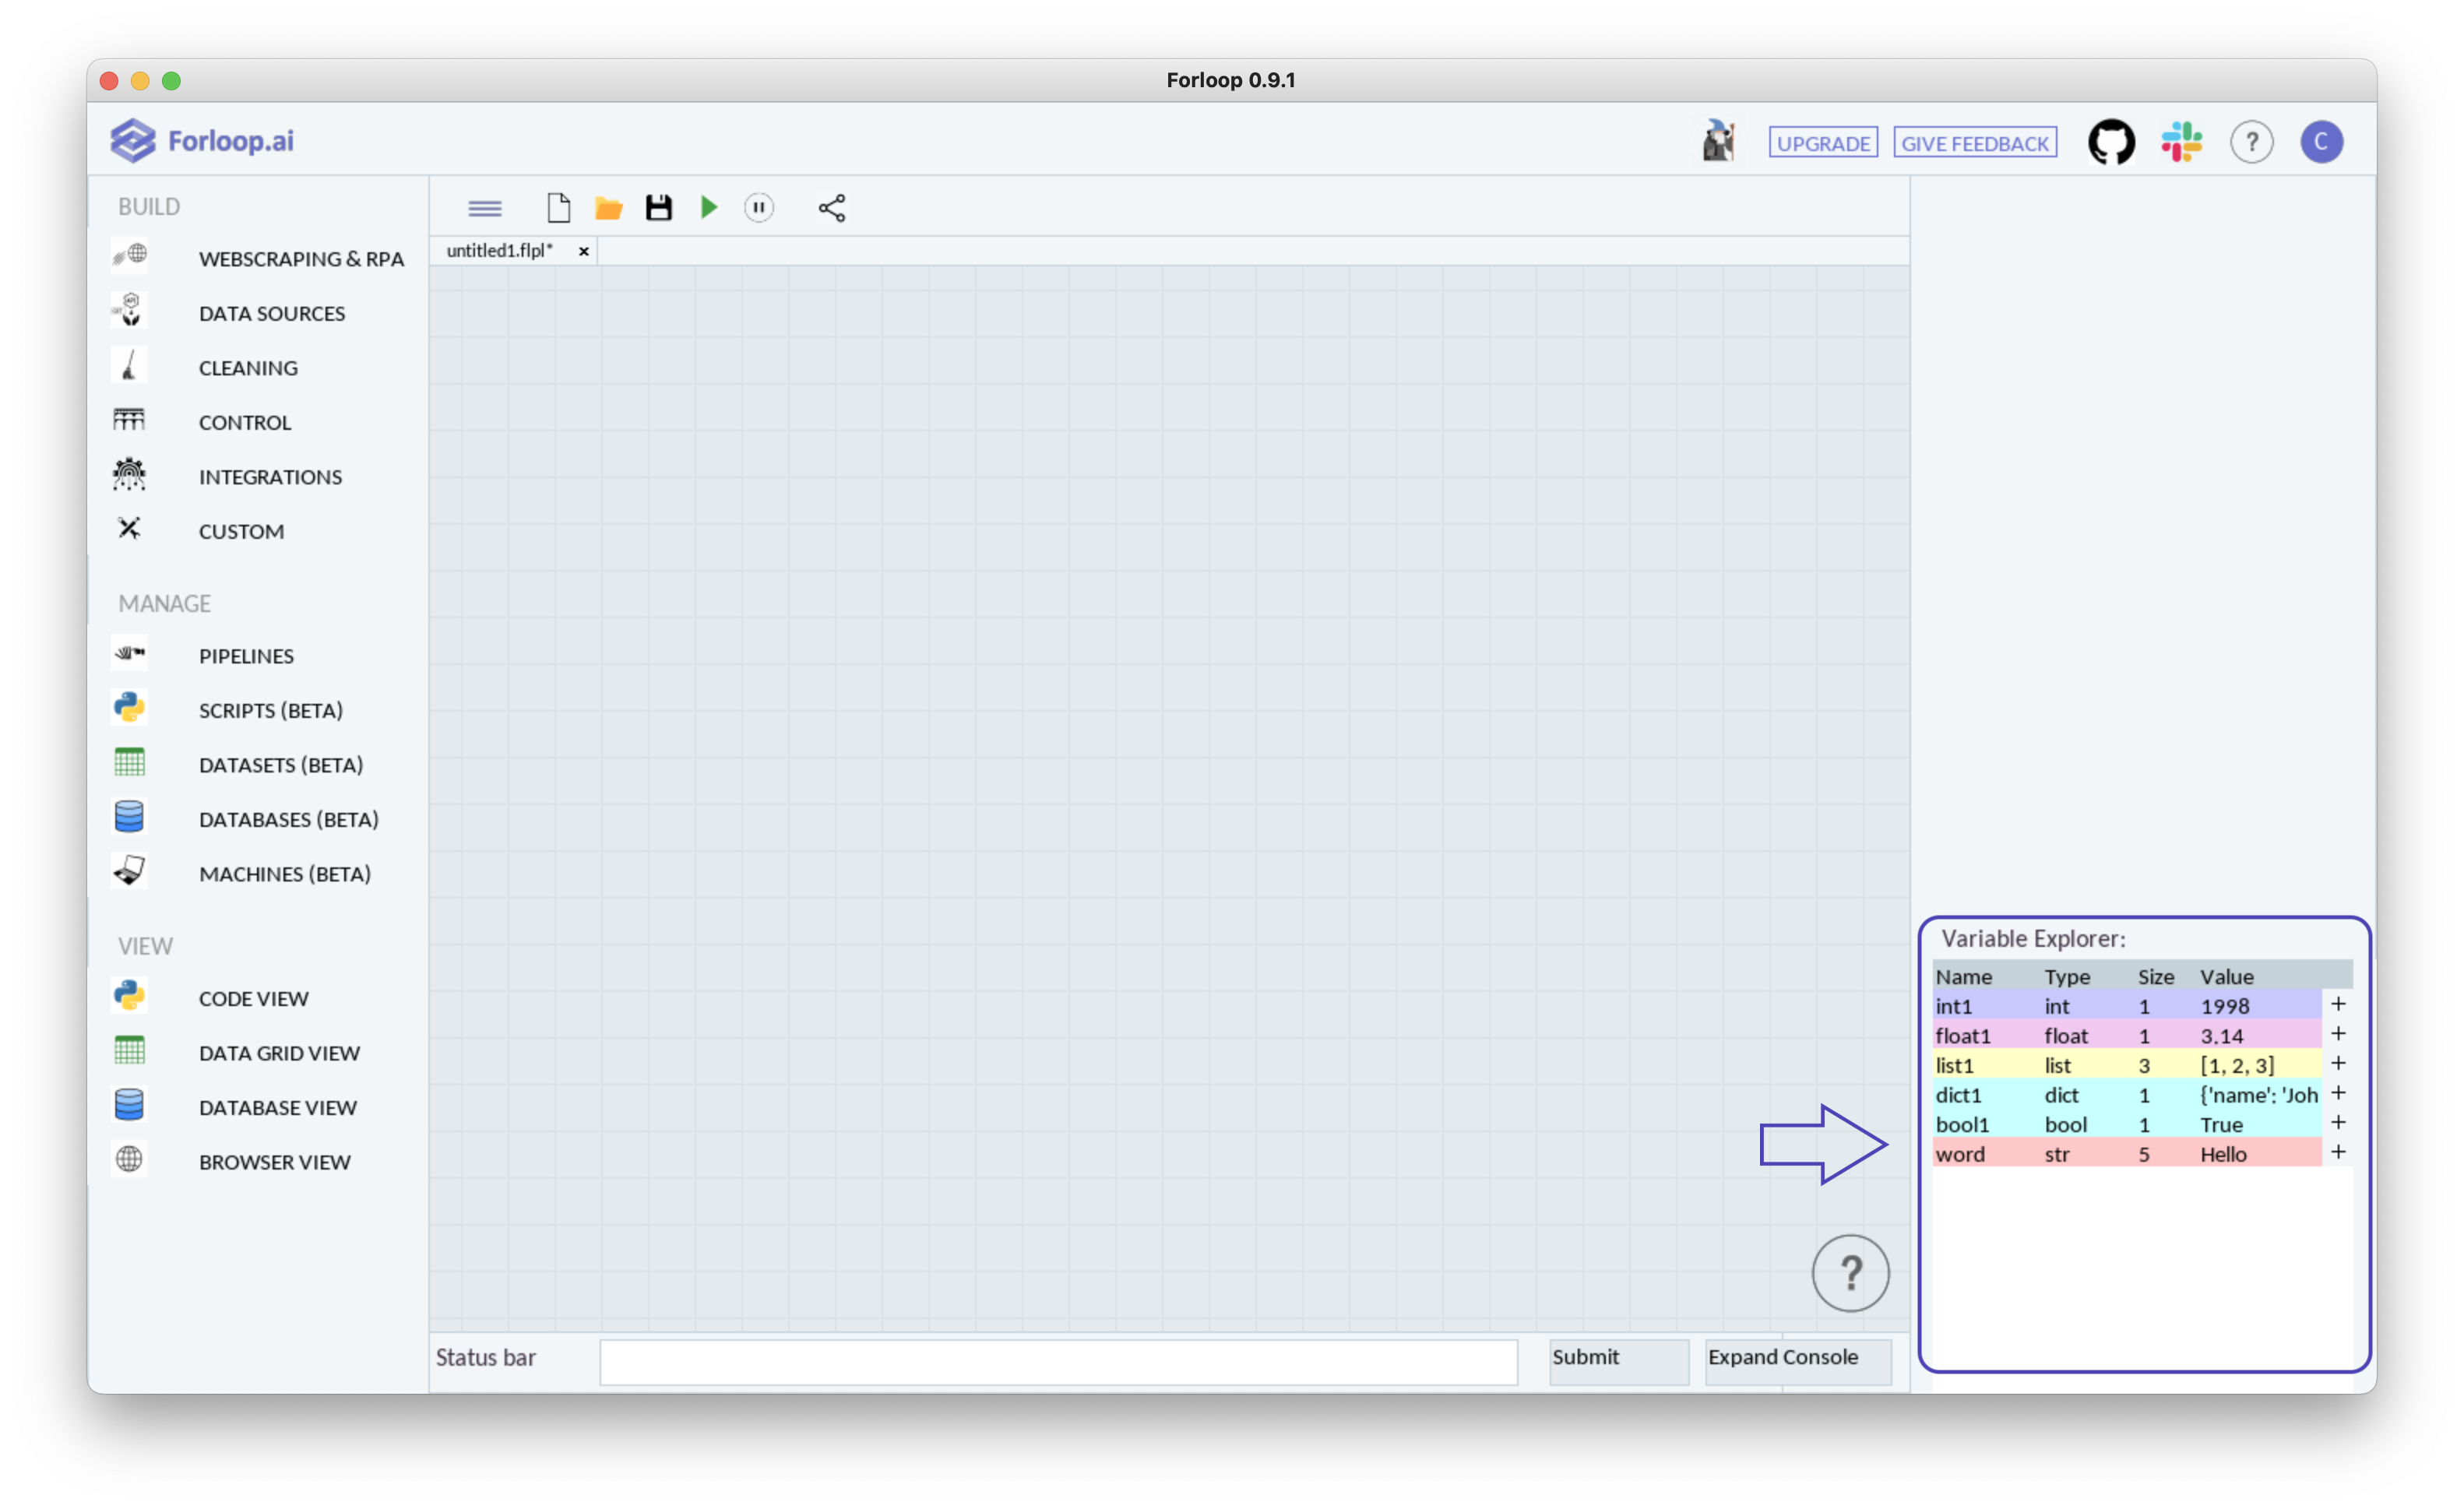
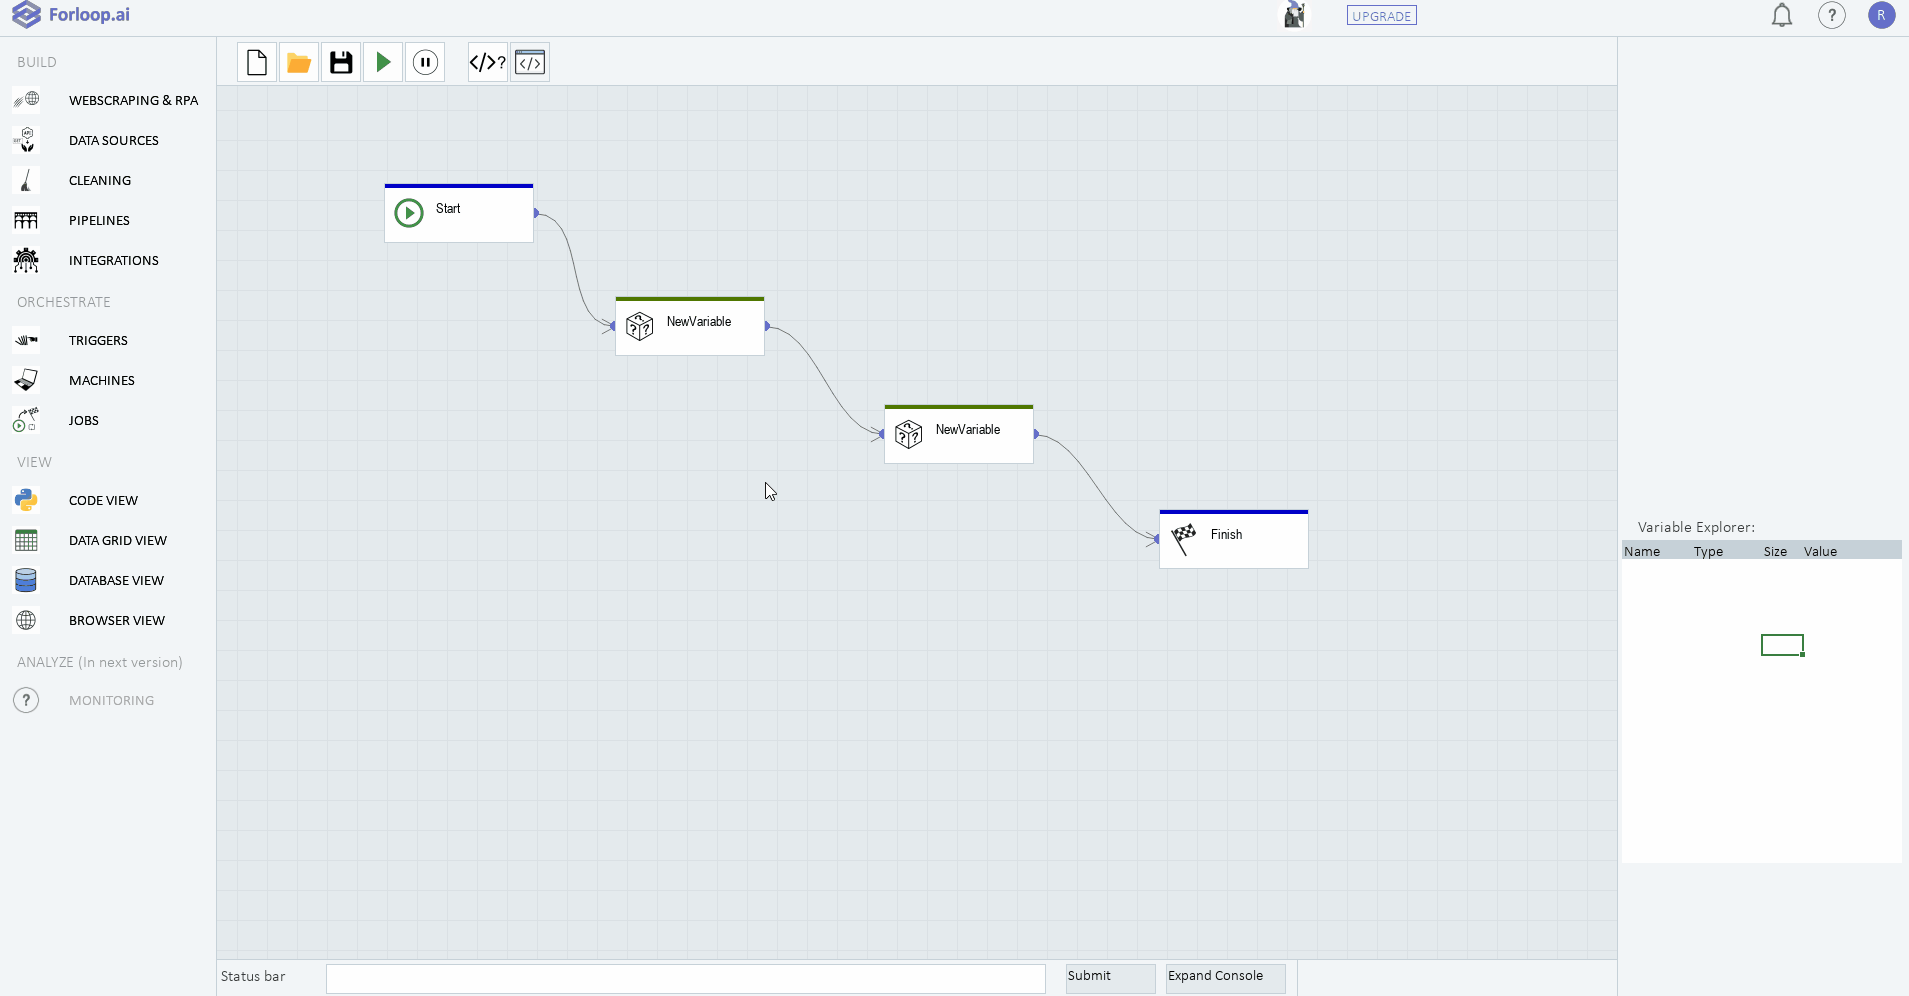
Let’s take a look at how the variables can be added. It can serve as a good training of creating a node as well. So, let’s find a Create New Variable node first. Clicking on an item in one of the menus creates a corresponding node. By clicking on the node in the working space we select it (its edges get colored). When a node is selected its UX appears above the variable explorer. In our case, a New Variable node, we just need to enter a name of the new variable and its value. Its type will be detected automatically. The whole process is shown in a short GIF below.
Note
New Variable node is not the only way of adding new variables to variable explorer! There are in fact many other options like Load Excel/CSV, Define function, New Datetime etc., which all create a new variable (dataframe, function, datetime, …). See Build Your First Pipeline or documentation of specific noodes for more information.
Build Your First Pipeline
In previous sections we here and there mentioned Forloops capability of building pipelines. After all it’s mentioned in the What is Forloop? section that it is one of the main features. So how does it work?
In previous sections have we seen a very basic creation of node and an interaction with it. But since working manually with only one single node at a time would be extremely dull, Forloop introduces an extremely elegant and easy way to build pipelines from these nodes. The process is fairly simple. Let’s start by explaining how the nodes get connected.
Connecting the Nodes
In order to connect two nodes with the idea being that the Node 1 will run first and after its task is done then the Node 2 will do its duty. To setup this process 3 elementary steps are required:
create two or more nodes as shown in previous sections
with a double-click on one of the nodes you bring it to the “ready to connect” state (its edges is colored differently than in case of a single click)
after we click on another node after a double-click on the first one both nodes get connected (we see it as an arrow)
Note
Building even an infinitely long pipeline can be done just by iteratively reapeating this process. However the Forloop team strongly discourage you from building an infinitely long pipeline as it can turn out to be a little time consuming.
Running the Pipeline
Okay, now we’ve got some nodes connected but what now? Now we can use the Pipeline Control Options in the upper panel.
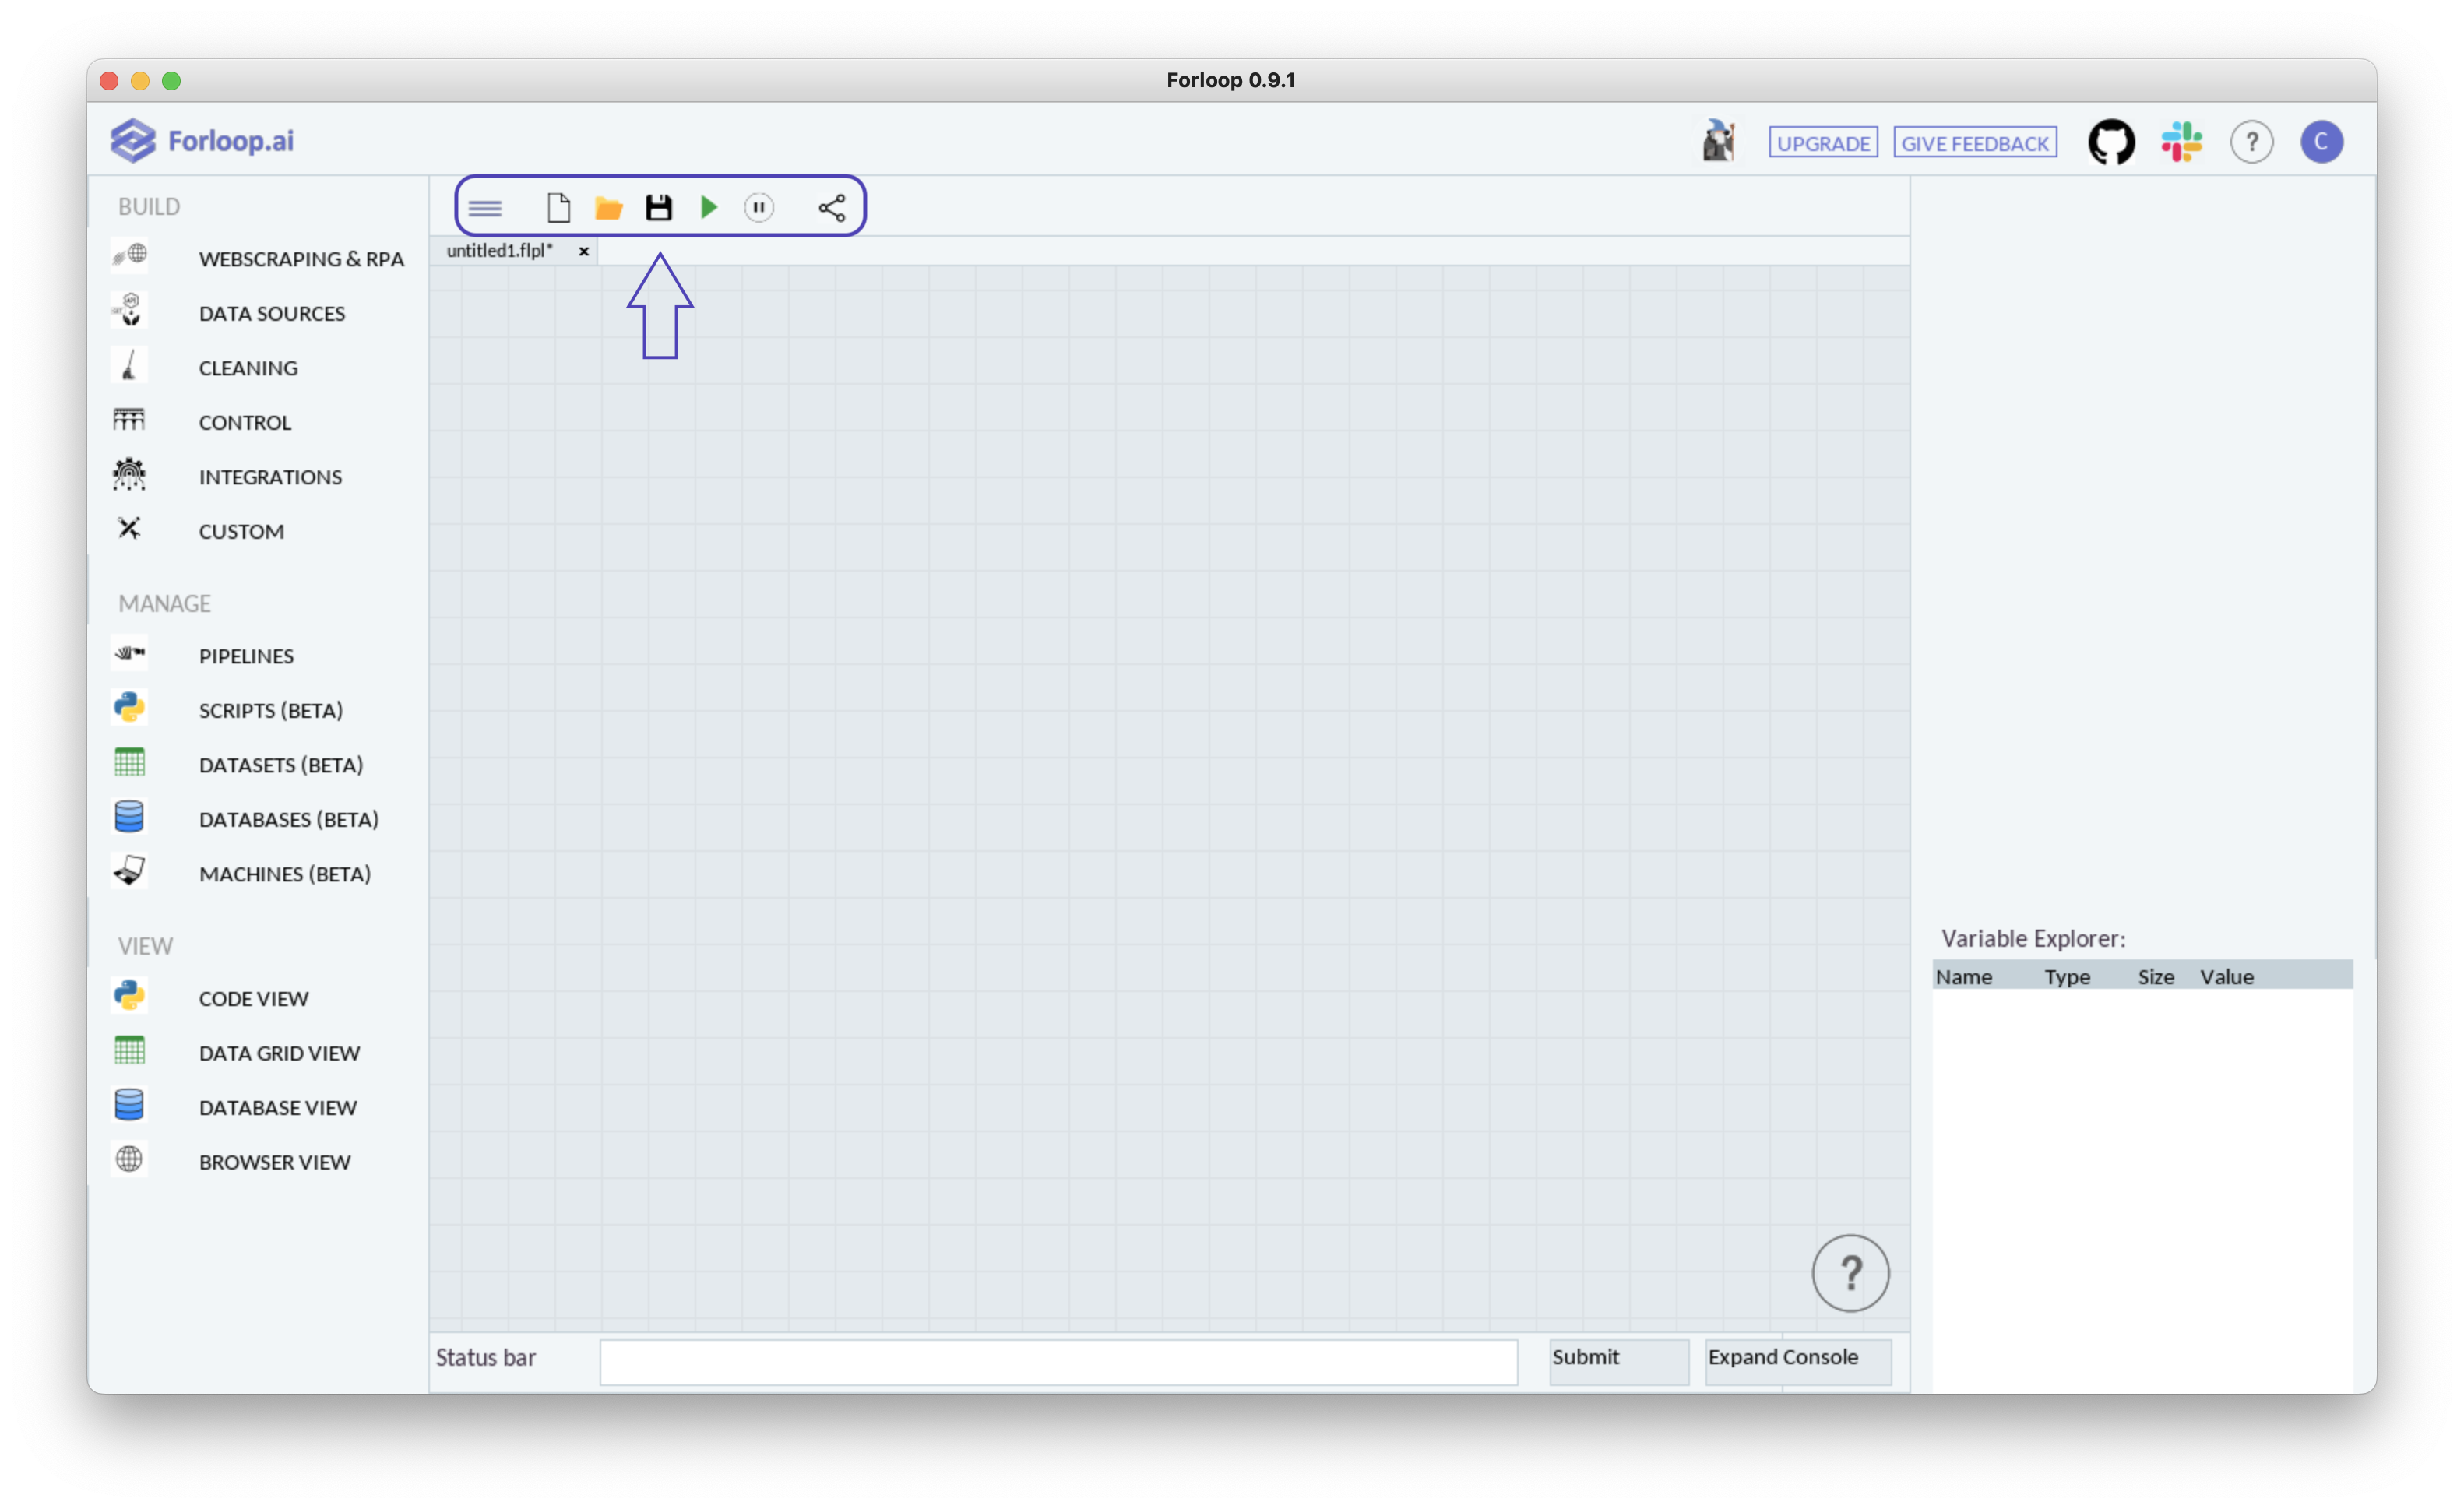
We can either save the pipeline if we like it, empty it if we don’t, load a new saved one or run the one present in our working space. The last option is what we will use.
Building a Basic Notepad Opening Pipeline
By combining all the knowledge we collected so far building a simple pipeline should be a piece of 🍰. Let’s build a really elementary one which only opens a notepad (or its macOS/Linux counterpart). What we need is:
Use key node to hit win button (or cmd + space combination to open Spotlight on macOS)
Write node to write notepad (or some other app) into search
Use key again to hit enter (return)